Monday, January 2, 2017

Happy New Year, 2017!

It's that time of year again--a New Year and a new resolution for me. I don't usually make resolutions as such. I think about wanting to make some new lifestyle habits, but it seems to me that New Year's resolutions don't tend to "stick" for many (including me).

Fireworks by US Dept of State https://flic.kr/p/8gNExJ
Fireworks photo by U.S. Department of State
This year, however, I am making a resolution. My resolution is to post to this blog more often. My big goal is to post at least once a month; that's pretty ambitious for someone who goes 6 months or more between posts.  For that reason, my smaller goal is to post at least every other month.  This current post doesn't count since it's just about my plans for the year.

The reason for this resolution was that a couple of my friends asked very sincerely that I resume my blog on a regular basis. They've even agreed to help out by writing guest posts or contributing recipes for me to try. My friend, James, is going to have a cookbook party this month where guests bring something made from a cookbook recipe--NOT a recipe found online, but one from an actual cookbook.  This can be a favorite or a new recipe they are trying.  I'm hoping James will do a guest post about the party and the recipes that were tried. *hint hint  I've also been promised a fine-tuned Sloppy Joe recipe from friends K & M.

I will be making turkey vegetable soup tonight when I get home from work. After Thanksgiving I froze the turkey carcass and a bunch of leftover turkey meat so I could use it to make soup. I took everything out of the freezer last night and put it in the fridge.  I'll be including celery, carrots, onions, and maybe some potatoes. What other vegetables would be good in this soup?  Leave me suggestions in the comments.

Wishing you all a very Happy New Year!

Sunday, May 22, 2016

Even More Soup!

Hi All,

I know it's been over a year since my last post, and anyone who reads my blog (all 10 of you) has probaby given up on me, but I'm still here and still cooking.

This post is not about a recent meal, but about one from a month or so ago.  I used to make this amazing red lentil soup with garam malasa from a recipe I got from Epicurious. I made it a lot, every couple of months probably.

The soup is really good made according to the recipe. The wonderful mixture of spices make it a very flavorful soup.  I've made it many times in the past exactly according to the recipe, though sometimes adding chicken or chopped up veggies like peas, celery, or summer squash to the soup to make it a bit heartier.

I haven't made this soup in several years, and when I went to make it a couple of months ago, I was surprised that it didn't turn out like I'd remembered. It was much soupier than I remembered--more brothy, not as thick. Also the flavors were a bit flat.  I'm not sure why.  So I doctored it up a bit by adding some more spices, a little maple syrup (it needed some sweeteness to balance out the spices), and a can of coconut cream (like coconut milk but thicker--I got mine from Trader Joe's).  The result was so good!  It was even better than I remember the original being.

I think next time I might add one or two additional carrots, grated, to the soup. This would add some sweetness, and I could leave out the maple syrup.  This soup is delicious just plain, but it would also be very good with some chopped-up, leftover veggies and/or chicken thrown in.

Here's my version:

Red Lentil Soup with Garam Masala and Coconut Cream
Adapted from Epicurious
http://www.epicurious.com/recipes/food/views/red-lentil-soup-with-garam-masala-14125

INGREDIENTS

2 ½ cups dried red lentils (about 1 pound), picked over and rinsed
2 medium onions, chopped fine
1 medium carrot, diced
2 tablespoons olive oil
1 ½ teaspoons salt or to taste
2 teaspoons chili powder
1 ½ teaspoons ground coriander
1 teaspoon turmeric
1 teaspoon freshly ground black pepper
¾ teaspoon ground cumin
¾ teaspoon ground cinnamon
¼ teaspoon cayenne
¼ teaspoon ground cardamom
1/8 teaspoon ground cloves
1 teaspoon mild Madras curry (I used Williams Sonoma's coarse Madras curry)
6 cups water
1 Tablespoon Better than Bouillon Vegetable Base dissolved in 2 cups hot water (or 2 cups vegetable broth)
1 can (13 oz.) coconut cream or coconut milk (if using coconut milk, reduce water by 1 cup)
1 - 2 Tablespoons honey or maple syrup

PREPARATION

In a bowl soak lentils in water to cover by 2 inches for 1 hour and then drain well.

In a 4-quart heavy saucepan cook onion and carrot in oil over moderate heat, stirring occasionally, until onion is golden and carrots have softened. Stir in salt and spices and cook over moderately low heat, stirring occasionally, 5 minutes. Stir in lentils, water, and broth and simmer until lentils fall apart, about 20 minutes. (Old lentils may take longer to cook.) Let soup cool slightly.

Transfer soup to a blender in batches and purée ½ to ¾ of the soup then add back to pan (or use an immersion blender). Pureeing thickens the soup, but you still want some of the texture of the lentils. In pan heat soup over moderate heat, stirring, until hot. Add coconut cream and stir until well combined--do not let the soup boil. Add honey or maple syrup to taste. Adjust salt & seasonings if necessary. Best the next day.

Some notes:

  • You definitely want to use red lentils. These are quite different tasting than regular brown or green lentils. Red lentils are much more common than they used to be, so you should be able to find them in your regular grocery store. If not, try a Whole Foods, Trader Joe's, or a natural foods store.
  • I usually use yellow onions, but white are also fine.
  • The recipe doesn't specify the type of chili powder, so I used what I had, which was Spice Islands Chili Powder. I've used Gebhardt's in the past.
  • I love Better than Bouillon! I usually have the chicken base on hand, but since I was going to be sharing this will my friend who is a vegetarian, I made it with the vegetable base instead. BtB vegetable base is so much better than regular vegetable broth! If you don't have vegetable broth or BtB, you can use chicken broth instead. I would not recommend beef broth as it is too strongly-flavored.

I hope you enjoyed this post. Next time we'll continue the curry theme with Sweet and Spicy Curried Nuts!

P.S. I'm sorry there are no pictures, though this isn't the most picturesque soup being a sort of orangey-brown color, but it is delicious!

Sunday, November 2, 2014

More Soup!

     Today it finally feels like fall here--sort of.  The temperature is in the 60s, and it's overcast and a bit rainy. In my last post I made soup, but I've been craving more soup, especially something creamy. A thick, hearty soup just seems perfect for the weather today.

     I'm trying to keep up with my goal of (eventually) trying all of the recipes on my Cooking board on Pinterest.  I pinned this recipe for White Chicken Chili from the Cooking Classy blog a couple of weeks ago when I was looking at soup recipes after I made the Quick Chicken Meatball Soup.  It was an interesting recipe, using Neufchatel cheese and pureed beans to thicken the soup instead of a roux and cream or milk.  The cheese gives it a little creaminess and a slight tang that a dollop of sour cream gives a bowl of traditional chili.  A little lime juice adds a bit more tang and balances out the heat from the chili and paprika and the richness of the cheese and beans.

     I made the recipe pretty close to the original, but you know I had to tweak it a little, right?  Actually, the only changes I made were to increase the garlic and other spices.  I also used 1 can of cannellini beans and 1 can of small white beans because that's what I had in the house.  I added the extra spices after adding the beans because when I tasted the soup, it was a little light flavor-wise. I think it ended up being twice the garlic (because I love garlic) and one quarter to one half again as much of the other spices. The extra spices made it just right.  I served it as suggested with chopped cilantro and a little grated jack cheese.


Wednesday, October 15, 2014

Quick Chicken Meatball Soup

     It's fall!  That means soup weather must be here soon, right?  It is cooler--at work at least.  My office has been so chilly lately that I've been craving hot tea, cocoa, coffee, and, you guessed it, soup!  I wanted soup so much that I came home today and made a quick and easy soup.

     I heated up chicken broth in a saucepan and added a finely chopped yellow onion and two, large, finely-chopped garlic cloves.  I made chicken meatballs with ground chicken, a small amount of breadcrumbs, garlic powder, poultry seasoning, parsley, and salt & pepper.  I brought the broth up to a boil and added the uncooked meatballs.  I reduced the broth to a simmer and let the meatballs cook for 15 minutes.  Then I added a package of Kale Salad from the grocery store.  It was mostly chopped kale with a little copped purple cabbage.  I let the soup simmer for another 15 minutes until the meatballs were cooked through and the veggies were cooked but still firm.

     The soup turned out well, and I really enjoyed the broth and veggies especially.  The meatballs were tasty, but the texture was a little dense.  It made 4 servings so I'll have more to enjoy over the next few days.  Even if the outdoor temps aren't soup weather, at least I know my soup will warm me up in my chilly office.

Sunday, March 23, 2014

Breakfast Report

This time around it's a (very) short dinner report followed by a longish breakfast report. I don't have a lot of time during the week between work and class to cook and write posts.  Plus, it's usually dark at night (gosh, really?) by the time I finish cooking, so I can't get decent photos.  Natural light makes everything look better.  If I try to take photos using the kitchen light or the flash, the food never seems to look that edible.  As a result, I seem to end up writing these long posts on the weekend.  Maybe in the summer when things slow down a bit (ha!) and it's lighter later, I can post during the week sometimes.

Dinner Report

     Friday and Saturday I made BBQ Pork Ribs in the oven and chili.  The ribs were a little tough--a bit gristly, but the flavor was good.  Trader Joe's makes a pretty good Kansas City Style BBQ sauce.  The chili was yummy, but I have a feeling it's going to be pretty spicy when I have it for leftovers!  And that is the end of the dinner report.

     I don't usually have a lot of time to make breakfast during the week.  I like sleep too much to get up early enough to cook much more than an egg for breakfast or to just grab some yogurt before work. On the weekends, if I feel like it, I sometimes cook breakfast (if I get up before 11).  Sometimes I just eat leftovers.  I also sometimes make coffee, again if I feel like it and if have half & half or milk on hand for it.  This weekend I made spiced coffee and quinoa porridge.

Quinoa Porridge

Tri-colored quinoa
     If you are not familiar with it, quinoa (keen-wa) is the edible seed of a pseudocereal plant (not a grass like true cereal plants) that is actually related to beets and spinach. It's not a grain though sometimes it is referred to as a grain and it's naturally gluten-free, so for people with gluten intolerance or who don't digest grains well, quinoa can be a nice alternative from what I've read. It's cooked like rice and can be used in many recipes in place of rice.  I've had it before several times but always as a savory side or main dish.  My mom made a really delicious cheesy, broccoli quinoa recipe a few years ago when, at the time,

     I'd only had quinoa once before.  I had just cooked it in water with onion soup mix (a recommendation from James).  However, I misunderstood (my fault entirely) and used the whole packet of onion soup mix instead of half, and the quinoa was overwhelmingly oniony.  Not so tasty.  The cheesy, broccoli quinoa was a huge improvement.

Quinoa looks a little like lentils close up but doesn't taste anything like them.
     I've mentioned in previous posts that I am trying to make recipes that I've pinned to my Cooking board on Pinterest.  I pinned a recipe for quinoa cooked "cereal" or porridge a while ago and another just recently.  I decided to try making one of the recipes this weekend, which I did...sort of, because once again I've mashed up two different recipes.  These are Quinoa Porridge with Blueberries & Pecans from Closet Cooking  and Maple-Pecan Quinoa Porridge from Momtastic. The recipes are very similar in some respects: quinoa cooked in milk with maple syrup, cinnamon, and vanilla topped with pecans before serving.  They differ in that the former cooks for only 15 minutes, is very soupy, and has fresh blueberries.  The latter contains a tablespoon of brown sugar and a peeled and grated granny smith apple which is added halfway through cooking.  After 15 minutes of cooking, the apple is added and then the quinoa is cooked for another 10 minutes.  The quinoa is less chewy, the extra cooking time allowing the quinoa to soak up more of the milk.

     I didn't like the idea of quinoa swimming in a bowl of hot milk, so I decided to use the milk to quinoa ratio and cooking method from the Momtastic recipe but the spices from the Closet Cooking recipe.  I left out the fresh fruit because I thought I'd add some raisins to the finished dish.  I love dried fruit and nuts on oatmeal and figured that it would be good on this cooked "cereal" too.

     Unfortunately, when I set out to make my breakfast this morning (which ended up being brunch because I didn't get up until after 9), I realized that I only had 3/4 cup of milk.  I had a couple of tablespoons of cream, so I added that and a few tablespoons of water.  I ended up with a little less than 1 1/4 cups of milk for 1/2 cup quinoa.  I added the maple syrup, cinnamon, and vanilla to the milk right at the beginning, added the rinsed quinoa, and brought the whole lot to a boil.  Then I reduced the heat and simmered it for 15 minutes.  The quinoa was very soupy at that point and stil pretty chewy.  I gave it a stir and let it cook for another 10 minutes with the lid cracked.  I checked it again--still soupy but getting there.  I gave it another 10 minutes and it was just right.  Most of the milk had been absorbed and the quinoa was just slightly chewy.

Raisins and pecans were a good addition.  If you're interested, this is a bowl I made in ceramics class last year.
     I gave it a taste and decided against adding more sugar.  It was hardly sweet, but the milk, cinnamon, vanilla, and maple were all clearly there in the taste.  I didn't want to cover that up with sugar.  I did add some golden raisins and toasted pecans.  It was good.  Different from what I normally eat for breakfast, but I liked the combination of flavors & textures.  The first recipe, which also called for 1/2 cup quinoa said it was for 1 serving, but it was too much for me to eat the whole thing.  Quinoa swells up a great deal when cooked.  It was definitely more than a cup when cooked.  I ate a little more than half and was completely satisfied.  I'm going to save the rest and see if it's still edible when reheated.

Spiced Coffee

     I do enjoy my coffee.  Most of the time I'm happy with a nice strong cup of coffee with some half & half and a dash a sugar (ok, maybe a little more than a dash, but I can drink it black or just with milk too).  Sometimes, though, I like flavored coffee. Not the crazy stuff like raspberry, chocolate, almond, marshallow creme flavor, but I do like hazelnut or cinnamon, things like that. The problem is that many of the flavored coffees either don't taste very good, or they are artificially flavored (or both).  So, I decided to make my own.

     The idea originally came from my friend James.  Years ago, I was over at his house for dinner.  He made coffee after dinner and put some cinnamon in with the grounds in his French press.  It was really good.  I didn't really remember though until last summer, I think, when I was making coffee to chill and keep in the fridge.  Starbucks gets expensive.  I don't remember exactly why I thought of it but suddenly remembered James putting cinnamon in with his coffee and decided to try it.  It turned out quite tasty.  During the fall, what with the various specialty flavored coffees about, I decided to experiment.  I finally came up with a good spiced coffee that is all natural and, since I make it myself instead of getting it at Starbucks, considerably cheaper.

Spiced Coffee

I have a 4 cup coffee maker.  If you have a larger pot and usually make 10 or more cups, experiment with the amount of spices. If making 10 or 12 cups, try doubling the spices first (instead of tripling) then adjust up if the flavor is too light.  For my coffee maker I use:

1/8 tsp. ground cinnamon
2 pinches ground nutmeg
1/4 tsp. vanilla extract

I just sprinkle the spices and vanilla on top of the grounds and brew as normal.  It's really good hot or cold.
(I recycled this photo from a previous post, but it's pretty, and I didn't take a photo of my coffee today, so you get this one again.)


References:
http://wholegrainscouncil.org/whole-grains-101/quinoa-march-grain-of-the-month
http://en.wikipedia.org/wiki/Quinoa

Sunday, March 9, 2014

Spaghetti Squash Is Not Pasta (and That's All Right With Me)

I keep pinning new recipes to my Pinterest Cooking board, so I have to keep trying new recipes.  I don't want my Cooking board to get too full.  Once I try a recipe, I move it to a different board.  I had found a recipe for spaghetti squash months ago but hadn't tried it.  Spaghetti squashes were on sale when I went to the grocery store so I decided to try the recipe.  I've had spaghetti squash before, but I didn't like it as a substitute for pasta.  I kind of have an issue with foods trying to be substitutes for other foods to make dishes more healthy or lower calorie (I refuse to use the word "skinny." I want to scream every time I hear that word used to describe food or drink.).  There's generally a reason I like a dish a specific way.  If I'm going to eat spaghetti squash, I'm going to eat squash--not fake pasta.

Because I can't leave well-enough alone, I started looking at more spaghetti squash recipes.  I stumbled across 2 baked dishes, one featuring squash with chard and another with squash as a Carbonara type dish.  I decided to mash-up the two recipes and see how it turned out.  They were pretty similar recipes with eggs & cheese as a base.  I love a good Carbonara dish, so I used that recipe as a start and threw in spinach (instead of chard) and some spices.

It turned out good. Lots of flavor, but not too rich or heavy.  I liked the combination of veggies with the eggs, cheese, and spices--a little rich but lots of freshness from the squash & spinach.

Here's my version of the dish:

Baked Spaghetti Squash & Spinach Carbonara

3 cups cooked spaghetti squash
4 cups uncooked baby spinach, torn into pieces
4 ounces pancetta, diced
1/2 small yellow onion, diced
2 large eggs
1/4 cup ricotta cheese
3/4 cups coarsely grated Parmesan cheese
1/2 teaspoon salt
1/4 teaspoon black pepper
1/2 tsp garlic powder or 2 cloves garlic, minced
1/8 tsp red pepper flakes

Heat the oven to 350°F. Lightly grease an 8 x 8 inch (or similar) baking dish.

In a heavy skillet, cook the pancetta over medium heat until it starts to get crispy and much of the fat is rendered off.  Pour off much of the fat.  Add the onions and cook for 5 to 6 minutes or until soft and beginning to brown. Add the spinach and saute until wilted. Remove from the heat.

In a large bowl whisk the eggs, then whisk in the ricotta. Fold in the cooked bacon, spinach, and onions, then 1/2 cup of grated cheese and the spices.

Mix the squash strings into the egg and onion mixture. Spread in the baking dish and top with the remaining 1/4 cup of cheese.

Bake for 35 - 40 minutes or until firm and golden on top.  Let it cool for 15 minutes before serving.


Carnitas!

I love carnitas.  They are one of my favorite things to order in a Mexican restaurant.  I love the juicy, tender chunks of pork flavored just right with the wonderful crispy edges where the flavor intensifies.  Carnitas always seemed a mystery to me.  How do they make it so tender and yet crispy & crunchy at the edges in just the right balance?  Frankly, I didn't think too deeply about it since I was too busy savoring every delicious bite.  I never thought I'd be able to make carnitas at home.

Turns out, I was wrong.  I made carnitas last Saturday, and they were amazing.  They might not be the best carnitas I've ever eaten, but they hold their own against good carnitas at various places I've eaten.  They were even better than a couple of places I ate at in the past.  And I think I can make them even better next time.

I am reading David Lebovitz's book The Sweet Life in Paris, which is fully of funny vignettes about living in Paris, cooking, and life.  It's one of those books you don't have to read cover to cover.  I pick it up here and there and read a short chapter or section culminating in a (generally) delicious looking recipe. The other day the section I was reading ended with a short anecdote about visiting a Mexican restaurant in Paris and how disappointing it was.  He finished with a recipe for carnitas, which he likes to make for French friends to introduce them to Mexican food.  He says:

"Since Mexican food isn't especially well represented in Paris, I like to show friends how good it can be, and carnitas are the perfect introduction, since it doesn't matter whether you're from here or there: who doesn't love caramelized pork?" (pg. 62)

This recipe takes a long time.  Not even counting the prep, we're talking 4 1/2 to 5 hours of cooking time.  This is a multi-step process--but that process yields fantastic results.  After cutting the pork into large chunks, you sear them in oil in batches, allowing the pieces to get really brown on all sides--this takes a while.  Then you remove the pork, deglaze the pan with some water, add spices, and then plop the pork back into the pot and stick it in the oven to braise for 3 1/2 hours.

At 2 1/2 hours I was a little nervous about how the pork was going to turn out, because it still felt rubbery like it was undercooked or tough when I poked at with a spoon.  One hour later, and magic had happened.  The pork had become super tender and easy to shred into large, bite-sized pieces.  It was tender and juice, but it still had those crispy edges that are so yummy.  Frankly, I couldn't help myself from eat several bites right then, even before the last stage of cooking: caramelizing.

This last stage involves putting the shredded pork back into what's left of the cooking liquid and placing it back in the oven to allow the rest of the liquid to evaporate and caramelize on the pork.  I did start this step, putting the pork back into the oven, but I stopped about an hour later before it quite got all of the way to the caramelizing because it was 11 at night, and I needed to go to bed.  This doesn't seem to have hurt it any, because it was just as delicious today when I had some for lunch.  I heated it in the microwave at work, but it's even better reheated in a frying pan with just a little oil.

A slightly different version of the recipe appears on David Lebovitz's blog.  That recipe doubles the chili powder.  I think that would be even better.  The recipe in the book only calls for 1 teaspoon of chili powder.  I think a second teaspoon would add a little kick.  I have another piece of pork shoulder in the freezer, so I can make this again and try adding the extra chili powder.  I admit that (as usual) I did not follow the recipe exactly.  I think it's nearly impossible for me to do that.  As it is, I only tweaked this recipe a little bit.

Carnitas
by David Lebovitz
with some revisions by Alex--the majority of this recipe (and all the credit for its greatness) goes to David Lebovitz

4-5-pounds boneless pork shoulder, cut into 5-inch chunks, trimmed of excessive fat
1/2 to 1 tablespoon sea salt
2 tablespoons oil
water
1 cinnamon stick
1 teaspoon ancho chile powder
2 small bay leaves
1/2 teaspoon ground cumin
4 cloves of garlic, peeled and chopped

Rub the pieces of pork shoulder all over with salt. (I sprinkled; rubbing the salt in may be better)

Heat the oil in a roasting pan set on the stove top. Cook the pieces of pork shoulder in a single layer until very well-browned, turning them as little as possible so they get nice and dark before flipping them around. If your cooking vessel is too small to cook them in a single-layer, cook them in two (or more) batches.

Once all the pork is browned, remove them from the pot.  Pour in about a cup of water, scraping the bottom of the pan with a flat-edged utensil to release all the tasty brown bits.

Add the cinnamon stick and stir in the chile powder, bay leaves, cumin and garlic.  Put the pork pieces back in the pan and add enough additional water to cover the pork by about 2/3.

Braise uncovered in a 350 degree oven for 3½ hours, turning the pork a few times during cooking, until much of the liquid is evaporated and the pork is falling apart. Remove the pan from the oven and lift the pork pieces out of the liquid and set them on a platter.

Once the pork pieces are cool enough to handle, shred them into bite-sized pieces, about 2-inches, discarding any obvious big chunks of fat if you wish.

Return the pork pieces back to the roasting pan and cook in the oven, turning occasionally, until the liquid has evaporated and the pork is crispy and caramelized. The time this takes will depend on how much liquid the pork gave off, and how crackly you want them.

Even though this dish took ages, it wasn't really difficult to make.  Next time, I start it early, mid-morning maybe, to give myself plenty of time to finish the caramelization process fully.

Sorry for the lack of photos; I had to borrow one from David Lebovitz website.  My carnitas did look pretty much like that photo.  However, it belongs totally to him and not me, but I hope I'm forgiven for using it this once.  And check out his blog and his book, The Sweet Life in Paris.

Saturday, February 15, 2014

Cake or Cookie?

Well, instead of 5 months between reports, it's only 2 1/2 months this time.  I'm trying to get back into a routine of posting more often.  We'll see.

This is a dessert report actually, not a dinner report, but I think you'll like it anyway.  I made the best bundt cake a few weeks ago.  I love a good bundt cake, but this one was just amazing.  What type of bundt cake was it?   Wait for it...

Snickerdoodle Bundt Cake!


Yep, that's what I said.  Snickerdoodle Bundt Cake.  I love a Snickerdoodle Cookie.  There's something about the cinnamon-sugar encrusted vanilla-cookie goodness that's just as satisfying as a rich chocolate brownie.  For me at least.

I found this recipe through the Food Librarian's blog when she did her "I Like Big Bundts 2" series of 30 days of bundt cakes in 2010.  This was made on Day 29 just before National Bundt Day.  The original recipe came from the My Baking Addition blog.

I will say this recipe isn't complicated but it isn't a quick one either. It would also have been a lot easier if I had a stand mixer.  Lots of beating of ingredients for this one, and my hands got really tired using a hand mixer.  So, if you have a stand mixer, I'd really recommend using one for this recipe.

The only changes I made were to use 1 cup of full-fat Greek yogurt in place of the sour cream and sea salt instead of Kosher because that is what I had on hand.  I'm sure sour cream would be just as delicious. Also, if you make this, be careful not to pack your brown sugar when you measure it.  Finally, it really does help things to go together more easily if all of the ingredients are at room temperature.

The result was delicious.  This cake has a sweet and spicy crust of cinnamon sugar encasing a moist cake that in taste & texture is a cross between a pound cake and a sour cream coffee cake.  I highly recommend this cake.


Next time, I'll try to post something equally delicious. I've got lots of good recipes on my Pinterest boards.  Some I've tried and some I haven't yet like Rainbow Peanut Noodles, Pan Roasted Lemon Chicken, Leek Gratin, Fried Pickles, Harissa Roasted Carrots with Yogurt, Lemon, and Mint, Vietnamese Style Grilled Lemongrass Pork, Parmesan Crusted Broccoli, Crispy Brussel Sprouts with a Garlic Aioli, the list goes on.


Sunday, December 1, 2013

This is Fall!

Fall may be winding down, but with tonight's dinner, I feel like I'm still right smack in the middle of the season.  A few weeks ago my Mom sent me an email with a link to a recipe titled Pumpkin Stuffed with Everything Good.  Reading the list of ingredients I started drooling, but I didn't make it right away.  I had a small pumpkin from when I visited the pumpkin patch in October, but I hadn't decided what to do with it since I didn't carve it into a jack-o-lantern at Halloween.

So tonight, I pulled out that pumpkin and grabbed all of the ingredients and put it all together in a pretty short amount of time.  The thing that took the longest was scraping the innards out of the pumpkin.  After about an hour in the oven, the fantastic scent of garlic, cheese, pumpkin, and herbs was wafting out, scenting the air with its deliciousness.  It smelled incredible.  I removed the top of the pumpkin and let the filling brown on top for about 15 minutes.

I took a bunch of pictures but had some trouble since everything came out kind of yellow.  It looks so much better in person, and the taste is out of this world.

I'm not sure what kind of pumpkin this is, but since the recipe doesn't specify a variety, I think you could use any kind of pumpkin.  The flesh is very yellow and the textured kind of like spaghetti squash but more starchy.  It balances the richness of the filling well.  This was a very easy recipe but looks so cool when you cut into the pumpkin and that delicious filling spills out.

I hope I don't wait another 5 months before posting again.  It's that time of year again where lots of baking and cooking are a bit part of my days.  I love it!  Thanks for reading.

Sunday, July 28, 2013

Chicken, Corn, and Green Chili Casserole

Today's dinner recipe comes from One Pot of the Day: 365 Recipes for Every Day of the Year (Kate McMillan/Williams Sonoma, 2012).  I bought this last year and have only made a couple of the recipes.  I pulled it off the bookshelf last weekend and flipped through it, looking at all of the pages I bookmarked trying to remember which recipe on those pages was the one I wanted to make.  Most of the time it was obvious, but a few times I thought, "What was I thinking? I don't want to make any of these recipes."

The cookbook is organized chronologically.  There is one recipe for each day of the year.  June 16th is Chicken, Corn, and Green Chile Casserole.  The casserole is similar to a chicken pot pie but with corn and green chiles instead of mixed veggies and a cornbread-like topping instead of pie crust or a biscuit topping.  The sauce holding everything together is basically milk thickened with a little flour and seasoned with cumin, salt and pepper, onion, and garlic.

The completed dish turned out pretty well.  The filling was delicious.  Just a bit creamy with lots of chicken and corn.  The green chiles added some spice without being too hot, and combined well with the cumin.  The topping was just okay  It came out a little doughy even though I left the casserole in the oven for 30 minutes instead of 20.   The topping was just flour, cornmeal, baking powder, milk, and green onions.  I added 1/2 tsp of salt to the batter even though it didn't call for it because I thought it might end up being too bland.  I'm glad I did.  I think the topping would have been quite dull without it.  Adding just a bit of salt helped bring out the flavors.

I would definitely make this recipe again, but I think next time I'll change up the topping a bit.  I think using equal parts flour and cornmeal (the original recipe calls for 1 cup and 1/2 cup respectively) and maybe adding an egg will make the topping come out hardier and with more of a cornbread flavor.

I'm not thrilled with the photo, but the sun had gone down by the time the casserole was finished, and I had to rely on kitchen lighting and camera flash.

Sunday, June 30, 2013

Baked Eggs & Peach Muffins

     Friday breakfast (though it should probably be called lunch since I ate closer to noon than breakfast time) was Baked Eggs with Spinach and Bacon.  The recipe is from a blog called Oven Love via my Pinterest Cooking Board.  The recipe called for crisp-cooked bacon, spinach, cheese, eggs, and a little cream.  What's not to love?

Photo of baked eggs
     The eggs tasted good, but there are a couple of changes I'd make next time.  The cream was unnecessary, I think.  It slowed down the cooking of the egg whites.  In order to get the whites fully cooked, I had to pop the dish back in the oven and leave it in for much longer than the recipe estimated.  I ended up with hard cooked yolks instead of soft, slightly runny yolks, which would have been much better.  The other change I'd make would be to reserve the bacon and add it to the top of the egg dish instead of putting it in the bottom of the dish with the spinach.  The bacon got rubbery under the eggs.  Crispy bacon crumbled on top of the eggs would have tasted much better.

     I want muffins! That's what I said to myself Saturday night around 10pm.  Since it was 10 o'clock at night and I wasn't even hungry, I did not make muffins, but I did look at some muffin recipes so I could make some for Sunday breakfast.  I chose the Perfect Blueberry Muffin recipe from Smitten Kitchen as my base and then mixed it up a bit.  I made these back in March when I was out in Bodega Bay for my aunt's birthday weekend.  They turned out really well.  I think everyone enjoyed them as there was only 1 left after brunch that day.  I, however, don't care much for blueberries.  I don't actively dislike them, but I'd rather have any number of other flavors than blueberry.  The base muffin recipe was great though, a little sweet but not too sweet and with a soft and slightly spongy texture so they don't fall apart easily.  I thought I'd try making them again but with some other fruit than blueberries.

     This worked out well since I don't have any blueberries on hand, so I couldn't have made blueberry muffins even if I wanted to.  In fact, I didn't have any fruit except some frozen peaches.  Hmmm, I thought. Peach muffins sound promising.  I followed the recipe closely with the exception of substituting chopped frozen peaches for the blueberries and 1/2 cup whole wheat flour for 1/2 cup of the all-purpose flour.

Photo of peach muffins
     The muffins came out tasty, but a little light flavor-wise.  I think the peaches didn't have as strong a flavor as blueberries do.  The other flavoring in these muffins is lemon zest, which I included, but I think this batch of muffins would have been even better with the substitution of vanilla or almond extract for the lemon zest.  I think almond would be really good with peaches.  I would also chop the peaches finely.  I cut them into about a 1/2 inch dice.  Chopping them into smaller pieces would have dispersed the peach flavor better throughout the muffins.  The peach chunks weren't in every bite, so the flavor was uneven.  I also didn't like the texture of the large chunks of peach.  Every other bite I got this cold, slick piece of fruit amid the light and fluffy muffin.  The muffin texture was just as good as the first time I made this recipe, even with the addition of some whole wheat flour.

     Still, even though these aren't the best muffins, they satisfied my muffin craving.  They will probably be even better tomorrow morning split open, toasted, and topped with a little butter.  This recipe is a good muffin base recipe and would be good with many combinations of fruits and flavorings.  I'm thinking maybe vanilla with raspberries, cranberry-orange, or almond with apricot jam swirled into the batter.  Anyone have a favorite muffin recipe they'd like to share?

Monday, June 17, 2013

Pizza, Popsicles, & Peaceful Mornings

I like Friday mornings in the summer.  The library is only open Monday through Thursday, so we work four 10-hour days and have every Friday off.  I've been waking up somewhat early (for me, for a day off anyway) on Fridays and enjoying the peace of a quiet morning before it gets too hot.  Lately it's been pretty hot by 9, though this weekend was a bit overcast and a little cooler than it was during the week when we had some 100 + days.

     Iced coffee on a hot day is a pleasure.  I brew up a bunch of coffee over the weekend and keep it in an iced tea bottle in the fridge; it usually lasts most of the week.  Anyway, Friday morning I was pouring my glass of coffee and remembered this very cool picture my sister posted on facebook of her coffee with the cream just added.  It was black with these swirls of white and very cool looking.  I was inspired to try getting a similar shot.  Let me tell you, it isn't easy to photograph cream diffusing through coffee. You really only get a few shots before it's too late.  That's my cool Eeyore glass mug my Big Sis brought me from Disneyland.  It's even got my name engraved on it.  I love it.


     After the photos were taken, I sat down and enjoyed my coffee and read a few chapters of my book.  I'm reading The Sherlockian by Graham Moore.  It's a mystery involving the death of a member of The Baker Street Irregulars during the society's annual festivities in New York, a missing diary of Arthur Conan-Doyle, and the killing off of Sherlock Holmes and his subsequent return.  It's good so far, but I was jarred at one point by the use of the word "fractal" in a description of 1900 London from the p.o.v. of Conan-Doyle.  The term was coined around 1975.  I suppressed my irritation and continued reading because the book is interesting and the writing good otherwise.

     Friday evening I tried a new pizza dough recipe, and I think it's probably the best pizza dough I've ever made.  I used the recipe from King Arthur Flour.  The recipe calls for 7/8 to 1 1/8 cup water.  I used 1 cup, but the dough was really sticky.  Next time I'll probably use 7/8 of a cup instead.  I turned out fine though.  I just kneaded in a little more flour once I removed the dough from the bread machine before dividing the dough and then letting it rest before making the pizza. The dough was the perfect combination of chewy and crispy.

      I had some leftover pesto sauce, so I used that instead of a standard red sauce.  For toppings I used chopped leftover chicken breast and zucchini along with mozzarella and Parmesan cheeses.  The pizza turned out very yummy.  The pesto was very tasty and went well with the other toppings.  This picture is from Saturday lunch.  The leftover pizza was still very good the next day.

     Aren't popsicles so refreshing on a hot day?  Sunday, I made orange and raspberry cream-sicles based on a recipe I found on Pinterest.  I didn't have orange extract, so I left that out, and I used simple syrup in place of the honey as my honey is completely crystallized and was never going to blend into the other ingredients.  The flavor was good but too subtle.  I think using orange juice concentrate instead of orange juice would have produced a more "orangy" flavor. However, the reason I decided to try this recipe was because I had some fresh squeezed orange juice in the freezer.  It came from the last bag of Willcox oranges I bought before the season ended.  They were the best oranges, sweet and full of flavor, but they were starting to mold, so I cut off the moldy bits and juiced the rest of the oranges so they wouldn't go to waste.


     The recipe is supposed to make 6-8 popsicles, but my popsicle molds must be larger than the ones used by the person who created the recipe because I ran out after filling only 4 of my molds.  I had some very ripe raspberries, so I took some of those, added some simple syrup, mashed them up, and then mixed in a little half & half and filled the last 2 popsicles molds.  The raspberry ones weren't quite sweet enough, and they were very seedy.  I think it might be better to put some or all of the mashed raspberries through a strainer to remove some of the seeds.  The other aspect that wasn't ideal was the texture.  It was pretty icy instead of creamy.  I really should have expected that, since the mixture was simply frozen instead of processed in an ice cream machine first then poured into the molds.  Freezing the mixture in an ice cream machine, even partially, would reduce the iciness in the final product.  I'll have to try that next time and let you know how they turn out.  Darn, now I'll have to buy an ice cream maker.  The things I do for this blog.


Sunday, June 9, 2013

Sunday Baking

It's nearly Summer, and the heat here is on the rise. It's been in the mid to upper 90s this week, and I suddenly got an urge to bake. Such is the perverse nature of my whims at times. My timing could use some work. Luckily, I can make bread in the bread machine, which doesn't heat up the house much. However, I also want to make some flatbread, something similar to naan or soft pita, which makes it necessary to use the oven. Here's my plan for meals this week:

  • Baked chicken chimichangas
  • Curry made from repurposed gyros meat with vegetables on the above mentioned flatbread with a tsatsiki/raita hybrid to top it (The gyros were a fail I won't get into).
  • Tuna salad on home-made bread
  • Baked chicken legs of some kind & roasted brocolli with grated Manchego cheese

     The bread came out well. I liked the last loaf I made better, but this is a close second. It's made with part bread flour and part whole wheat for a little extra fiber. I had some with my lunch of leftover chicken. Bread & jam for Alex

It came out really light and fluffy, almost too fluffy.  I was worried it would tear while I was cutting it. I want to do some experimenting with the amount of yeast I'm using in breads because I might be using too much.


     I've been doing some reading about high-altitude bread making.  I'm at about 5,000 feet, but it doesn't feel much different here than other places at lower altitudes that I've lived. However, I think that while the altitude hasn't affected my other baking and cooking, it may be negatively affecting my bread.  And though the bread is pretty good, I think it could be better.


     The baked chicken chimichangas were easy to make.  I got the recipe here.  Sorry there's no picture, but they weren't much to look at. They just looked like crispy burritos. The filling is a combination of shredded leftover cooked chicken, salsa, cheese, and chopped green onion mixed with some spices, which you wrap up burrito-style in tortillas. The chimichangas are then placed on a baking sheet (I used parchment paper to minimize the mess.) and brushed with melted butter. I was too lazy to melt the butter, so I just spread a thin layer of softened butter on with a knife. It was a very thin layer, almost too thin to actually see on the tortilla. Then they were baked in a 400 degree oven for about 25 minutes until the tortillas are crispy and the filling is hot.

     The chimichangas were good, but not amazing. The filling was tasty but a little liquidy and made the bottom of the tortilla soggy. The idea of baking the chimichangas is a good one, but I'd probably make up my own filling. You could probably do this with chili colorado or chili verde or whatever your favorite chimichanga or burrito filling is.

Enjoy the week, and check back for another post in a few days.

Saturday, June 1, 2013

Farmers' Market and Fancy Butter

Happy June, everyone!  Today I took a drive over to Bisbee to check out their Farmers' Market.  I've only been to the one here in S.V.  It's on Thursdays, which makes it sometimes hard to get to when I'm busy at work.  The Bisbee market is pretty nice.  I got a good haul today.  I picked up some meat from Sky Island/47 Brand and San Ysidro Farms--the people are great!  They raise animals humanely and healthfully.  Happy cows (and pigs and lambs) make for healthier meat, in my opinion.

     From the Elfrida Community Garden stand, I got a variety of radishes and a giant rainbow beet.  I also picked up some French shallots and purple garlic.  I'll have to think of something yummy to make with these.


     When I got home, I was pretty hungry, so I made myself some lunch.  I had a lovely grass-fed beef steak that I thawed a couple of days ago and some fresh green beans I bought last weekend, both of which needed to be eaten.  I boiled the green beans until they were just cooked then drained them and sauteed them in a pan with a little garlic olive oil.  I put them in the oven to keep warm while I made the steak.  Just salt & pepper and a little garlic.  When the steak was medium-well, I put it on the plate with the green beans and topped it with a little gremolata butter.  I only managed to eat about half of it before I was full.

     What is gremolata butter, you ask?  Well, it's a compound butter made with  a mixture of minced garlic, chopped flat-leaf parsley, and lemon zest.  It is delicious sprinkled on meat, especially lamb.  I first heard of a gremolata when I made an amazing recipe for red-wine braised lamb shanks I found on Epicurious.

     This gremolata butter recipe came from Rachel Ray via my Pinterest Cooking board. I've pinned over 100 things to my cooking board and have made fewer than 5 of the recipes, so I'm trying to remedy that.  Tomorrow or perhaps later in the week I will be making a recipe for pesto chicken I pinned about a month ago.  The recipe calls for lemon juice in addition to the zest.  I was doubtful for 2 reasons: 1) mixing liquid into butter can be difficult and 2) I thought the juice would make the butter too tart.  Alas, I was right to be concerned.  This wasn't a total fail, but it wasn't a success either.  I didn't find it too hard to get the juice mixed in, but it did overwhelm the other flavors and make the butter too lemony.  I may try softening the butter again and adding more butter, garlic, and parsley to see if it tastes better.

I hope everyone is having a wonderful weekend.  More dinner reports later this week.

Tuesday, May 21, 2013

Cauliflower Alfredo with Chicken and Leeks

Alfredo sauce, cauliflower, leeks, garlic, chicken, butter, olive oil, cheese, salt, and pepper.  That's what went into my dinner tonight.  I've had this head of cauliflower in my fridge for several weeks, and it was starting to look a little peaky.  I knew I'd need to cook it soon or risk losing it. Cauliflower is delicious and versatile.  It would be too sad to be forced to toss such a lovely vegetable.  I started thinking about cauliflower in cheese sauce, which is delicious, but I didn't feel like making a full-on cheese sauce. I'm not sure exactly how I decided, but I was looking up recipes and came across one for Alfredo sauce.  I've never made Alfredo sauce, and it looked surprisingly easy.  I guess I always thought Alfredo was something tricky or difficult, ironically because it seemed so elegantly simple.

     Well, it is simple.  Do a Google search, and you'll see thousands of recipes.  I looked at about a dozen and chose what seemed to be the classic version and made mine based on that.  Basically, you melt some butter in a saucepan, add about a cup of cream, and let simmer for 5 minutes.  It will reduce a bit.  Then stir in 1 to 3 cloves of minced garlic and 1 1/2 to 2 cups finely shredded Parmesan cheese (about 2 ounces using a micro-plane grater). I used 3 cloves of garlic and 2 cups of mixed Parmesan and Romano cheese and added a dash or two of pepper.  This sauce is so delicious, wonderfully creamy without being thick or heavy.  It's just a luscious, light, and creamy sauce.

     For the whole dish, here's what I did.  I cleaned and cut the head of cauliflower into largish, bite-sized pieces.  I cleaned the leeks--they were a bit gritty--then halved then length-wise and sliced them.  I melted a little butter along with a little olive oil in a large skillet.  I sauteed the leeks until they were soft then tossed in a couple of cloves of roughly chopped garlic and sauteed for another minute or two.  I then added the cauliflower and stirred to coat it with the leek/garlic/butter mixture.  Once the cauliflower was coated, I poured it in a baking dish and finished cooking the cauliflower by roasting it in a 400 degree oven.  I think it took about 30 minutes in the oven to get the cauliflower to the tender but not mushy point--your mileage may vary.

     While the cauliflower was roasting, I sauteed some more chopped garlic in the same skillet for a few minutes then added some cut up chicken breast.  I decided I needed some protein.  You could make it without chicken easily, and it would be just as delicious.  Once the chicken was almost completely cooked, I pulled the cauliflower out of the oven and added the chicken to the baking pan.  I popped it back in the oven to finish cooking while I made the sauce.  I turned the oven off at this point.  There was enough heat left to finish cooking the chicken and vegetables.

     Once the sauce was ready, I took the cauliflower dish out of the oven and poured the contents into the sauce.  I used a large spoon to gently fold the chicken and vegetables into the sauce.  I then stirred in a little chopped parsley.
Oh yum!  The leeks had caramelized and added savory oniony, caramel goodness to the sauce.  The roasted cauliflower isn't watery the way cauliflower can get when you boil or steam it.  The garlic, cheese, cream mixture brought everything together, and the fresh parsley added a fresh, sharp note to the richness of the dish.  My whole house smells fantastic.

     I ate about a cup of the mixture for dinner, and it was plenty.  I'm guessing, but I think this made about 6 servings.  If you made it without the chicken, you could serve it as a side and it would stretch to even more servings.

Saturday, March 2, 2013

Ah, Love, Thy Name is Bread Machine.


I got a bread machine for my birthday (Thanks, Mom!).
This is the one I got. Photo from Amazon.com
 I've been wanting to make my own bread.  Like most processed or prepared foods, the ingredients on loaves of bread in the store contain a LOT of ingredients.  I've been thinking a lot about the ingredients in prepared or processed foods. When I read the back of a package, I wonder why there are so many ingredients listed when the recipe for making the same thing contains half (or fewer than) that number.

     Example, Wonder Bread (which despite being made by the defunct Hostess Foods is not gone forever as it has been sold to another company) has 29 ingredients listed on its package--29!  Now, not all store-bought breads contain this many ingredients, but even Milton's 100% Whole Wheat Bread, arguably a much healthier choice than Wonder, contains 14 ingredients. Also, all store-bought breads seem to contain soy in one form or another.  Now, I'm not anti-soy.  I like soy sauce and the occasional bean curd stir fry. I do have a problem with the fact that so much of soy is GMO. Also, it's the general problem I have with all these added ingredients in food.

     How many ingredients are there in a homemade loaf of bread?  I'm glad you asked.  It depends on the recipe you are making, but for a basic white loaf, the bread cookbook I have calls for 9.  Some of the bread recipes call for fewer, but 6 - 10 ingredients is usual among the recipes.  Also, all of these ingredients are recognizable.  Water, honey and/or sugar, butter or oil, flour, yeast, and salt are the basics. Some recipes call for dry milk powder for added protein and wheat gluten for protein and to make the bread softer. However, no artificial ingredients or colors are called for and no weird fillers either.

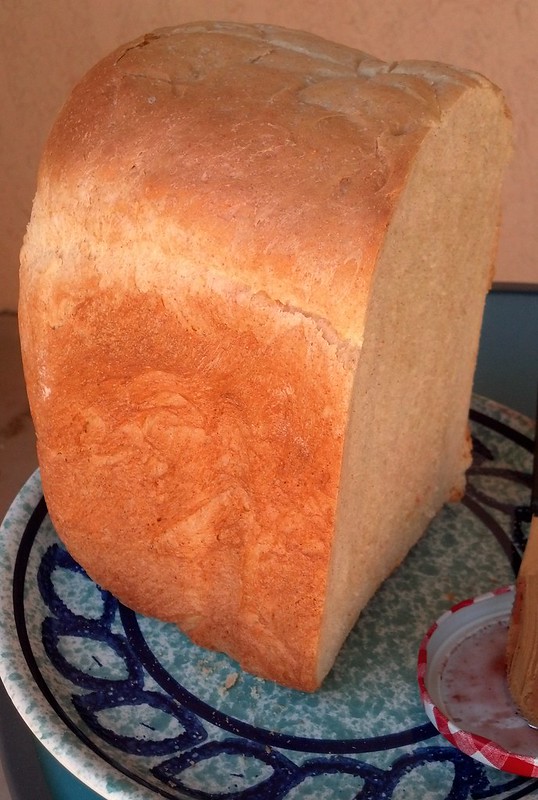
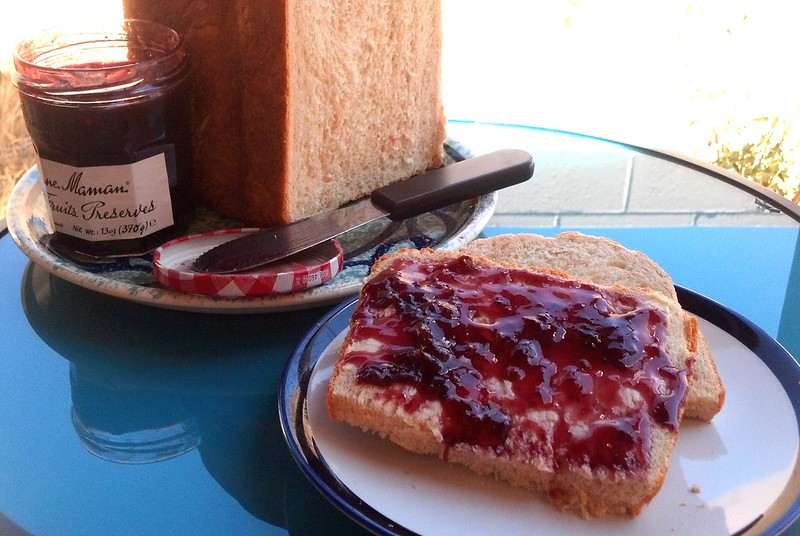
     I've made bread before, but it never turned out all that well.  It was edible, but not super tasty.  I never seem to be able to knead the dough properly.  The bread machine solves that.  The first thing I made with my bread machine was a loaf of the above mentioned white bread.  I ran the whole bread machine cycle from mixing to baking.  It turned out well. My problem was that I had no bread knife.  That didn't deter me for long, I just hacked off pieces and ate them.  I ended up freezing half the loaf until I got a chance to find a good bread knife.

     The next thing I made was pizza dough. This time I just ran the dough cycle on the bread machine, which mixes, kneads, and rises the dough, but doesn't bake it.  I made one batch with all white flour and one batch with half white and half whole wheat flour.  They both turned out great.  Perfectly chewy, crusty pizza dough.  I had a couple of friends over, and we made individual pizzas with lots of yummy toppings including pepperoni, sausage, zucchini, onions, and lots of cheese.  Makes me hungry just thinking of them.

     Then I made sticky buns.  Oh my goodness, these were stunningly delicious.  I found the recipe for Morning Sticky Buns in Beth Hensperger's The Bread Lover's Bread Machine Cookbook (Harvard Common Press, 2000).  The buns came out perfect.  I couldn't believe it.  The best thing about these was that the insides didn't end up too gooey.  The caramel topping was wonderfully gooey, but the bun itself was soft, but fully cooked, not underdone and doughy like they can be.  I highly recommend them for a special treat.

Morning Sticky Buns

Recipe by Beth Hensperger from The Bread Lover's Bread Machine Cookbook

Ingredients

For the dough:
1 1/4 cups fat-free milk
1 teaspoon vanilla extract
3 tablespoons unsalted butter, cut into pieces

3 cups unbleached all-purpose flour
3 tablespoons sugar
1 1/4 teaspoons salt

2 teaspoons SAF yeast or 2 1/2 teaspoons bread machine yeast

For the cinnamon filling:
3/4 cup light or dark brown sugar
1 tablespoon ground cinnamon
6 tablespoons unsalted butter, softened

For the caramel:
1/3 cup unsalted butter
1 cup light or dark brown sugar
1/4 cup light corn syrup
1 cup chopped pecans

1. To make the dough, place all the dough ingredients in the pan according to the order in the manufacturer's instructions.  Program for the Dough cycle; press Start.  The dough ball will be soft, yet at the same time smooth and springy.  Combine the sugar and cinnamon for the filling in a small bowl.  Set aside.

2. To make the caramel, 10 minutes before the end of the Dough cycle, grease the sides and bottoms of a 13-by-9 inch glass or metal baking pan. (I prefer to use a metal or disposable aluminum pan if I will be rising the buns overnight in the refrigerator--a glass pan cold from the refrigerator could break when placed in a hot oven.)  Combine the butter, brown sugar, and corn syrup in a small skillet or heavy saucepan over low heat, stirring constantly.  When the butter is melted and the sugar is dissolved, remove from the heat.  Immediately pour into the baking pan.  Spread evenly over the bottom with a rubber spatula.  Sprinkle with the nuts.  Set aside.

3. When the machine beeps at the end of the cycle, press Stop and unplug the machine.  Turn the dough out onto a lightly floured work surface.  Roll it into a 12-by-15 inch rectangle.  Add the filling:  Leaving a 1-inch border around all the edges-spread the surface evenly with the 6 tablespoons soft butter, then sprinkle evenly with the sugar and cinnamon, which will be quite a light filling.  Roll up jelly-roll fashion starting from a long edge, and pinch the seam to seal.  With a serrated knife using a gentle sawing motion, cut the roll into 12 equal portions, each slice about 1 1/2 inches thick.  Place the slices close together on top of the caramel, spiral cut side down.  Cover loosely with plastic wrap and let the rolls rise at room temperature for 45 minutes, or until puffy and even with the rim of the pan.  (The rolls can be refrigerated before this last rise, covered tightly with a double layer of plastic wrap, leaving the rolls to rise to rise slowly and be baked in the morning.  Remove the pan from the refrigerator and let rest for 20 minutes before baking.)

4. Meanwhile, preheat the oven to 350 degrees F.

5. Bake the buns until the tops are brown, 30 to 35 minutes.  Remove from the oven and let stand no more than 5 minutes on a wire rack.  Place the cooling rack on top of the pan and, securely holding the hot pan with oven mitts, invert the pan on top of the rack, taking care not to touch the not caramel.  Let cool for at least 20 minutes, then transfer to a serving plate.  Pull the buns apart and serve warm.

Sorry for the lack of photos.  I never seem to plan ahead these days for taking pictures for the blog.  I'll try to do better in the future.

Some references:
Wonder breads 29 ingredients: http://theysmell.com/wonder-bread-ingredients/
Milton's 14 ingredients: http://www.shopwell.com/miltons-100-whole-wheat-bread-whole-grains/bread/p/0654192088
The Bread Lover's Bread Machine Cookbook on Amazon.com

Sunday, January 13, 2013

Playing Catch Up

Happy New Year! It was a very busy December for me both cooking-wise and work-wise. Work went absolutely mad in December. Between holiday parties (5), a huge job assessment questionnaire to complete, and a last minute website makeover, I was dead tired and mentally exhausted.

I did get to do a bunch of baking and cooking for the above mentioned holiday parties. I made toasted oatmeal cookies and shortbread cookies for our libraries' open houses, stuffed pasta shells (x2) for the end of the semester parties for our student library aides, and Holiday Beans for the staff Christmas party.

I really like the Toasted Oatmeal Cookies. I found the recipe at the Betty Crocker website.  The first time I made this recipe, I adapted it a bit to use what I had on hand.  I had used my oats to make granola, and I realized that the granola was very similar to what goes into the cookies: oats and nuts, toasted in the oven before being incorporated into the dough.  Instead of the 2 1/2 cups of oats and the 1 cup of nuts, I used 3 1/2 cups of granola. The recipe only calls for brown sugar, but I've found that this can make the cookies come out too thin and a little too sweet.  It works better if you don't pack the brown sugar, and I think I might try it with 1 cup brown and 1/2 cup white next time.

I've mentioned the shortbread cookies in a prior post.  The recipe I use comes from Brown Bag Designs Shortbread pans.  I've used their Classic Shortbread recipe for years, and it never fails.

Now for the stuffed pasta shells...I realize that I haven't blogged about these before, and I must amend that oversight right now.  These are always a huge hit, and I've made them for potlucks at work (current and past jobs) and for family dinners and special occasions.  I got the idea from a pasta cookbook I have.  I changed the recipe, of course.  I just can't seem to help myself.  They're not difficult, but there are several steps and the prep takes a while.  The filling has cream cheese, cheddar cheese, mozzarella  milk, eggs, and a little basil.  I use my regular spaghetti sauce I make (usually without meat though) for covering the shells before baking.  The shells are vegetarian as long as you don't use any meat or broth in your sauce.

Stuffed Pasta Shells

For the filling:
1 eight (8) ounce package cream cheese, softened
3 - 4 large eggs, room temperature
1/2 cup milk
3 - 3 1/2 cups shredded cheese (I use a mix of cheddar and mozzarella.)
1 1/2 tsp. dried basil (optional--sometimes I forget to put it in and the shells are still yummy.)
a couple of dashes of black pepper


1 box jumbo pasta shells (I like Barilla, but I've had good results with other brands as well.)
3 cups spaghetti sauce (approximately--should be enough to fill in all of the spaces around the shells once they are in the pan with some sauce left to go over the top of them.  The sauce doesn't need to cover them completely, but there should be plenty)

Make the Filling:
Place the cream cheese in a large mixing bowl.  Beat it on low speed with a hand mixer until the cream cheese is smooth.  Add the eggs and continue beating until well incorporated.  There may still be small chunks of cream cheese, but that's okay as long as it's mostly blended well with the eggs. Stir in the milk, and then fold in cheese.  The filling can be mixed and chilled an hour or two head of time.  Chilling the filling helps thicken it and makes it easier to fill the shells.

Pre-cook the Pasta:
Cook the pasta shells according to the package directions, but for a minute less than al dente.  For example, if the pasta box says that the shells will cook to al dente in 10 minutes, I cook them for 9 minutes.  Drain and rinse the shells in cold water until they are cool enough to handle.

Assemble the Shells:
Preheat oven to 350 degrees.  Rub a little olive oil over the bottom and sides of a 13 x 9 inch baking pan.  Spread about 3/4 cup of sauce in the bottom of the pan.

Using a teaspoon (not the measure, but the place-setting spoon), spoon filling into shells.  Fill each shell with a heaping scoop.  The shells should be filled but not overstuffed.  The edges of the shells should still be able to touch.  Place each shell in the pan as you fill it.  You should be able to fit all of the shells into the pan.

Pour the remaining sauce over the shells then gently shake the pan to get the sauce into all of the spaces between the shells.  Loosely cover with a piece of foil and bake in the oven for 45 minutes.  Remove the pan from the oven, take off the foil, and sprinkle the top of the shells with some freshly-grated Parmesan cheese. Put the pan back in the oven for 15 minutes, until the Parmesan is melted and the sauce is bubbling.

Remove from the oven and let sit for 20 minutes before serving.

After all the craziness of the last two weeks of work, I flew back to California to spend Christmas with family.  I got a chance to relax over the holidays, and I had a great time visiting my wonderful family: mom, sister, brother-in-law' and nephew, and some of my dearest friends.  I didn't get to see my brother and sister-in-law, but we did have a nice talk on Christmas.  However, I got to visit them back in September, which was great.  I was so happy to see them.  They moved away when I moved here to Arizona, and I hadn't seen them since I moved.  Hopefully we can all be together next year around Christmas.

I hope you all had a very Merry Christmas, Happy Hanukah, and wish you a very Happy New Year.

Tuesday, October 16, 2012

Holiday Beans

I wrote the following dinner report last year, but I never got around to posting it.  I stumbled across it the other day (virtually speaking--it's on my computer) and thought I'd post it.  

Well, it's been an age since I last posted.  I apologize for the long delay in posts.  It's not that I haven't been cooking or eating dinner; it's just the I've been wrapped up in moving, starting a new job, learning a new job, and generally getting used to my new life and routine.  Now that I've finished my first semester as a college librarian, I have 5 wonderful weeks off to celebrate Christmas with (some of) my family, visit my friends, and then enjoy my birthday before heading back to Spring semester 2012.

Since I last posted, I have cooked quite a bit.  I've made some old favorites like chili, scotch broth, spaghetti, and linguine carbonara.  I've also made stuffed pasta shells and a ton of cookies for various Christmas gatherings for work as well as the famous Praline Pumpkin Torte.

One of my favorite things to make for family holiday get-togethers is the doctored up baked beans that were one of my dad's favorites.  He really liked baked beans in most forms, but he always said these were his favorite.  I just wish he could be here this year to have them again.  The beans are pretty simple to make, starting with canned beans and adding a few ingredients, but the result is so good.

Alex's Christmas Beans

8 oz bacon, regular--not thick cut
1 large yellow onion, finely minced
2 large (28 oz.) cans Bush's Original Baked Beans
Yellow Mustard
Brown sugar

Chop or snip the bacon in to very small pieces.  I like to use a pair of kitchen shears as they make short work of the bacon.  Over medium heat, saute in a large, deep saucepan, stockpot, or dutch oven until bacon is just barely crispy and most of the fat has rendered out.  Scoop out the bacon with a slotted spoon and allow to drain on a paper-towel covered plate.  Pour out all but about 2 tablespoons of the bacon fat.  Add the onion and cook until soft and beginning to turn a caramel color.  

Once the onion is completely soft, pour in the two cans of beans, liquid and all. Stir to incorporate the onions throughout.  Add 2 Tbsp yellow mustard and 1/4 cup brown sugar and stir to combine well.  Stir in the bacon pieces.  Heat to bubbly, then reduce heat and simmer for 30 minutes. Taste the beans.  They should have a sweet, mellow smoky flavor with a bit of tang.  Adjust as needed with either mustard or brown sugar and allow to simmer for another 30 minutes to 1 hour.  These beans can just sit on the stove simmering while you prepare the rest of the dinner.  These are especially good served with ham and cornbread.

Thanks for reading.  I'm going to be trying a couple new recipes this week, so I hope to add 1 or 2 additional posts soon.  I'm making Bacon, Lentil, and Spinach Stew and Chicken and Leek Pie from my new cookbook, "One Pot of the Day: 365 Recipes for Every Day of the Year."  I'll also be roasting a chicken with lemon and fresh herbs, (I'll use the leftovers for the pie.) and doing some roasted root vegetables or maybe a vegetable curry.  I love fall!

Saturday, September 29, 2012

Mmmm...Lamb

This week, I made Spicy Grilled Lamb Burgers in pitas with tzatziki sauce.  I posted about a similar dish I made about 2 years ago.  I sort of just tossed that one together.  For this one, I did some research, and it was even better than the last one.

In case you don't know, tzatziki is a Greek yogurt cucumber sauce usually served with pita wedges or on gyros. There are many variations of tzatziki around the Meditteranean and south-western Asia. In India, cucumber raita is similar in taste but much thinner. It's great for cooling down spicy curries. I looked up recipes for tzatziki and read several. I didn't follow any one recipe, but took the common elements among most of the recipe I read. I did not include the fresh herbs some of the recipes called for (usually dill, mint, or parsley), but I wasn't concerned with making a truly authentic tzatziki because I was making curried lamb burgers, not Greek gyros. There were differences in the various recipes. It's funny, some recipes called for plain yogurt, some called for sour cream, and some called for both. The recipes that called for plain yogurt had you strain the yogurt first for several hours to get out the excess liquid. Doing that, you end up with a thicker yogurt instead of the thin regular yogurt.


Since I had a container (6 oz.) of Chobani non-fat plain Greek yogurt, I skipped that step since Greek yogurt has already been strained. I added 3 cloves of garlic, minced and about 2/3 of a peeled cucumber. I had a regular cucumber with seeds, so I cut it in half and scraped out the seeds before grating it using a regular box grater. You can also use an English or Japanese seedless cucumber. I squeezed out some of the liquid using a paper towel then mixed the shredded cucumber into the yogurt. I stirred in about 1/2 tsp olive oil (for texture) and the juice of half a lemon. I then added just a little salt to taste. Once it was well mixed, I put it in the fridge to let all the flavors meld.

After about an hour I pulled it out of the fridge to taste it. The flavors came together nicely, but it was pretty tangy. I stirred in about 1/2 of a teaspoon of sugar and then let it sit while I made the lamb.

For the lamb burgers, I found this recipe for Spicy Lamb Patties on All-Recipes.com. I followed the recipe, though I didn't have green onion so substituted a little finely minced white onion. I flattened out the patties then grilled them using my non-stick grill pan rubbed with a little oil.

Normally, I would probably pop the pita in the microwave to heat up. However, since moving, I don't have a microwave, and I don't miss it all that much. Instead, I patted just a tiny bit of water onto the whole wheat pita then wrapped it in foil and put it in the oven to heat up. This turned out great. I ended up with a soft, warm pita.

I put the burger in the pita and slathered on some tzatziki and bit in. I couldn't believe how good it turned out. I only wish I'd had some lettuce to put in the pita with the burger. That would have been perfect.  All in all, a highly successful dinner.

Friday, September 7, 2012

Dinner Photos and Others

I ate leftovers last night, and the Vegetable Curry was still really good.  I took some of the leftover rice, mixed in some slivered almonds, and made it into small patties which I then cooked in a non-stick skillet.  I reheated the curry and poured it over the rice and added some fresh spinach.  Very yummy.  The pictures aren't the greatest, but you can get the idea.

In case that isn't particularly appealing, here's a nice picture of a rainbow over my neighbor's house...
and some clouds I saw while driving home...

and It's A Small World at Disneyland all lit up...


and a cool b&w ladybug I found on my car a few months ago.