Showing posts with label baking. Show all posts

Saturday, February 15, 2014

Cake or Cookie?

Well, instead of 5 months between reports, it's only 2 1/2 months this time.  I'm trying to get back into a routine of posting more often.  We'll see.

This is a dessert report actually, not a dinner report, but I think you'll like it anyway.  I made the best bundt cake a few weeks ago.  I love a good bundt cake, but this one was just amazing.  What type of bundt cake was it?   Wait for it...

Snickerdoodle Bundt Cake!


Yep, that's what I said.  Snickerdoodle Bundt Cake.  I love a Snickerdoodle Cookie.  There's something about the cinnamon-sugar encrusted vanilla-cookie goodness that's just as satisfying as a rich chocolate brownie.  For me at least.

I found this recipe through the Food Librarian's blog when she did her "I Like Big Bundts 2" series of 30 days of bundt cakes in 2010.  This was made on Day 29 just before National Bundt Day.  The original recipe came from the My Baking Addition blog.

I will say this recipe isn't complicated but it isn't a quick one either. It would also have been a lot easier if I had a stand mixer.  Lots of beating of ingredients for this one, and my hands got really tired using a hand mixer.  So, if you have a stand mixer, I'd really recommend using one for this recipe.

The only changes I made were to use 1 cup of full-fat Greek yogurt in place of the sour cream and sea salt instead of Kosher because that is what I had on hand.  I'm sure sour cream would be just as delicious. Also, if you make this, be careful not to pack your brown sugar when you measure it.  Finally, it really does help things to go together more easily if all of the ingredients are at room temperature.

The result was delicious.  This cake has a sweet and spicy crust of cinnamon sugar encasing a moist cake that in taste & texture is a cross between a pound cake and a sour cream coffee cake.  I highly recommend this cake.


Next time, I'll try to post something equally delicious. I've got lots of good recipes on my Pinterest boards.  Some I've tried and some I haven't yet like Rainbow Peanut Noodles, Pan Roasted Lemon Chicken, Leek Gratin, Fried Pickles, Harissa Roasted Carrots with Yogurt, Lemon, and Mint, Vietnamese Style Grilled Lemongrass Pork, Parmesan Crusted Broccoli, Crispy Brussel Sprouts with a Garlic Aioli, the list goes on.


Sunday, June 30, 2013

Baked Eggs & Peach Muffins

     Friday breakfast (though it should probably be called lunch since I ate closer to noon than breakfast time) was Baked Eggs with Spinach and Bacon.  The recipe is from a blog called Oven Love via my Pinterest Cooking Board.  The recipe called for crisp-cooked bacon, spinach, cheese, eggs, and a little cream.  What's not to love?

Photo of baked eggs
     The eggs tasted good, but there are a couple of changes I'd make next time.  The cream was unnecessary, I think.  It slowed down the cooking of the egg whites.  In order to get the whites fully cooked, I had to pop the dish back in the oven and leave it in for much longer than the recipe estimated.  I ended up with hard cooked yolks instead of soft, slightly runny yolks, which would have been much better.  The other change I'd make would be to reserve the bacon and add it to the top of the egg dish instead of putting it in the bottom of the dish with the spinach.  The bacon got rubbery under the eggs.  Crispy bacon crumbled on top of the eggs would have tasted much better.

     I want muffins! That's what I said to myself Saturday night around 10pm.  Since it was 10 o'clock at night and I wasn't even hungry, I did not make muffins, but I did look at some muffin recipes so I could make some for Sunday breakfast.  I chose the Perfect Blueberry Muffin recipe from Smitten Kitchen as my base and then mixed it up a bit.  I made these back in March when I was out in Bodega Bay for my aunt's birthday weekend.  They turned out really well.  I think everyone enjoyed them as there was only 1 left after brunch that day.  I, however, don't care much for blueberries.  I don't actively dislike them, but I'd rather have any number of other flavors than blueberry.  The base muffin recipe was great though, a little sweet but not too sweet and with a soft and slightly spongy texture so they don't fall apart easily.  I thought I'd try making them again but with some other fruit than blueberries.

     This worked out well since I don't have any blueberries on hand, so I couldn't have made blueberry muffins even if I wanted to.  In fact, I didn't have any fruit except some frozen peaches.  Hmmm, I thought. Peach muffins sound promising.  I followed the recipe closely with the exception of substituting chopped frozen peaches for the blueberries and 1/2 cup whole wheat flour for 1/2 cup of the all-purpose flour.

Photo of peach muffins
     The muffins came out tasty, but a little light flavor-wise.  I think the peaches didn't have as strong a flavor as blueberries do.  The other flavoring in these muffins is lemon zest, which I included, but I think this batch of muffins would have been even better with the substitution of vanilla or almond extract for the lemon zest.  I think almond would be really good with peaches.  I would also chop the peaches finely.  I cut them into about a 1/2 inch dice.  Chopping them into smaller pieces would have dispersed the peach flavor better throughout the muffins.  The peach chunks weren't in every bite, so the flavor was uneven.  I also didn't like the texture of the large chunks of peach.  Every other bite I got this cold, slick piece of fruit amid the light and fluffy muffin.  The muffin texture was just as good as the first time I made this recipe, even with the addition of some whole wheat flour.

     Still, even though these aren't the best muffins, they satisfied my muffin craving.  They will probably be even better tomorrow morning split open, toasted, and topped with a little butter.  This recipe is a good muffin base recipe and would be good with many combinations of fruits and flavorings.  I'm thinking maybe vanilla with raspberries, cranberry-orange, or almond with apricot jam swirled into the batter.  Anyone have a favorite muffin recipe they'd like to share?

Monday, June 17, 2013

Pizza, Popsicles, & Peaceful Mornings

I like Friday mornings in the summer.  The library is only open Monday through Thursday, so we work four 10-hour days and have every Friday off.  I've been waking up somewhat early (for me, for a day off anyway) on Fridays and enjoying the peace of a quiet morning before it gets too hot.  Lately it's been pretty hot by 9, though this weekend was a bit overcast and a little cooler than it was during the week when we had some 100 + days.

     Iced coffee on a hot day is a pleasure.  I brew up a bunch of coffee over the weekend and keep it in an iced tea bottle in the fridge; it usually lasts most of the week.  Anyway, Friday morning I was pouring my glass of coffee and remembered this very cool picture my sister posted on facebook of her coffee with the cream just added.  It was black with these swirls of white and very cool looking.  I was inspired to try getting a similar shot.  Let me tell you, it isn't easy to photograph cream diffusing through coffee. You really only get a few shots before it's too late.  That's my cool Eeyore glass mug my Big Sis brought me from Disneyland.  It's even got my name engraved on it.  I love it.


     After the photos were taken, I sat down and enjoyed my coffee and read a few chapters of my book.  I'm reading The Sherlockian by Graham Moore.  It's a mystery involving the death of a member of The Baker Street Irregulars during the society's annual festivities in New York, a missing diary of Arthur Conan-Doyle, and the killing off of Sherlock Holmes and his subsequent return.  It's good so far, but I was jarred at one point by the use of the word "fractal" in a description of 1900 London from the p.o.v. of Conan-Doyle.  The term was coined around 1975.  I suppressed my irritation and continued reading because the book is interesting and the writing good otherwise.

     Friday evening I tried a new pizza dough recipe, and I think it's probably the best pizza dough I've ever made.  I used the recipe from King Arthur Flour.  The recipe calls for 7/8 to 1 1/8 cup water.  I used 1 cup, but the dough was really sticky.  Next time I'll probably use 7/8 of a cup instead.  I turned out fine though.  I just kneaded in a little more flour once I removed the dough from the bread machine before dividing the dough and then letting it rest before making the pizza. The dough was the perfect combination of chewy and crispy.

      I had some leftover pesto sauce, so I used that instead of a standard red sauce.  For toppings I used chopped leftover chicken breast and zucchini along with mozzarella and Parmesan cheeses.  The pizza turned out very yummy.  The pesto was very tasty and went well with the other toppings.  This picture is from Saturday lunch.  The leftover pizza was still very good the next day.

     Aren't popsicles so refreshing on a hot day?  Sunday, I made orange and raspberry cream-sicles based on a recipe I found on Pinterest.  I didn't have orange extract, so I left that out, and I used simple syrup in place of the honey as my honey is completely crystallized and was never going to blend into the other ingredients.  The flavor was good but too subtle.  I think using orange juice concentrate instead of orange juice would have produced a more "orangy" flavor. However, the reason I decided to try this recipe was because I had some fresh squeezed orange juice in the freezer.  It came from the last bag of Willcox oranges I bought before the season ended.  They were the best oranges, sweet and full of flavor, but they were starting to mold, so I cut off the moldy bits and juiced the rest of the oranges so they wouldn't go to waste.


     The recipe is supposed to make 6-8 popsicles, but my popsicle molds must be larger than the ones used by the person who created the recipe because I ran out after filling only 4 of my molds.  I had some very ripe raspberries, so I took some of those, added some simple syrup, mashed them up, and then mixed in a little half & half and filled the last 2 popsicles molds.  The raspberry ones weren't quite sweet enough, and they were very seedy.  I think it might be better to put some or all of the mashed raspberries through a strainer to remove some of the seeds.  The other aspect that wasn't ideal was the texture.  It was pretty icy instead of creamy.  I really should have expected that, since the mixture was simply frozen instead of processed in an ice cream machine first then poured into the molds.  Freezing the mixture in an ice cream machine, even partially, would reduce the iciness in the final product.  I'll have to try that next time and let you know how they turn out.  Darn, now I'll have to buy an ice cream maker.  The things I do for this blog.


Sunday, June 9, 2013

Sunday Baking

It's nearly Summer, and the heat here is on the rise. It's been in the mid to upper 90s this week, and I suddenly got an urge to bake. Such is the perverse nature of my whims at times. My timing could use some work. Luckily, I can make bread in the bread machine, which doesn't heat up the house much. However, I also want to make some flatbread, something similar to naan or soft pita, which makes it necessary to use the oven. Here's my plan for meals this week:

  • Baked chicken chimichangas
  • Curry made from repurposed gyros meat with vegetables on the above mentioned flatbread with a tsatsiki/raita hybrid to top it (The gyros were a fail I won't get into).
  • Tuna salad on home-made bread
  • Baked chicken legs of some kind & roasted brocolli with grated Manchego cheese

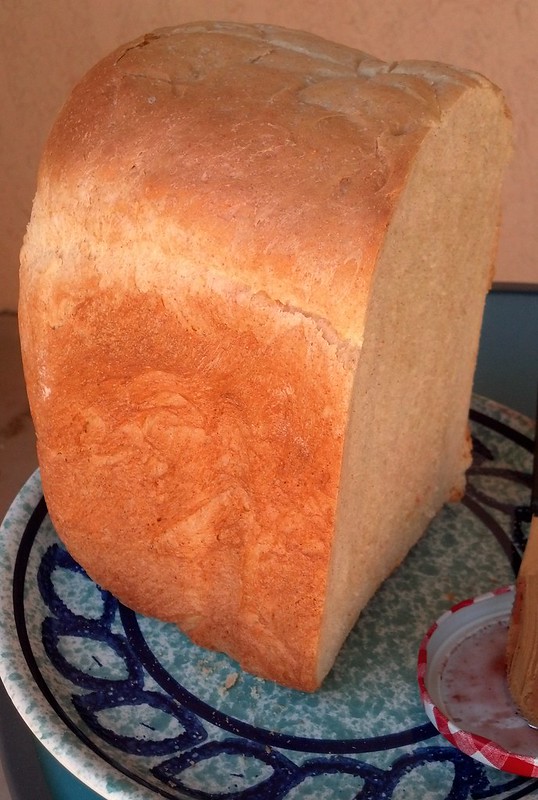
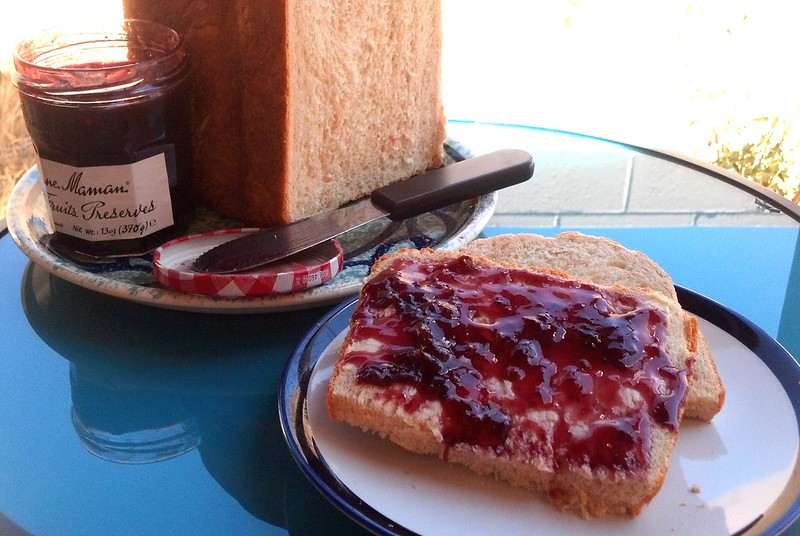
     The bread came out well. I liked the last loaf I made better, but this is a close second. It's made with part bread flour and part whole wheat for a little extra fiber. I had some with my lunch of leftover chicken. Bread & jam for Alex

It came out really light and fluffy, almost too fluffy.  I was worried it would tear while I was cutting it. I want to do some experimenting with the amount of yeast I'm using in breads because I might be using too much.


     I've been doing some reading about high-altitude bread making.  I'm at about 5,000 feet, but it doesn't feel much different here than other places at lower altitudes that I've lived. However, I think that while the altitude hasn't affected my other baking and cooking, it may be negatively affecting my bread.  And though the bread is pretty good, I think it could be better.


     The baked chicken chimichangas were easy to make.  I got the recipe here.  Sorry there's no picture, but they weren't much to look at. They just looked like crispy burritos. The filling is a combination of shredded leftover cooked chicken, salsa, cheese, and chopped green onion mixed with some spices, which you wrap up burrito-style in tortillas. The chimichangas are then placed on a baking sheet (I used parchment paper to minimize the mess.) and brushed with melted butter. I was too lazy to melt the butter, so I just spread a thin layer of softened butter on with a knife. It was a very thin layer, almost too thin to actually see on the tortilla. Then they were baked in a 400 degree oven for about 25 minutes until the tortillas are crispy and the filling is hot.

     The chimichangas were good, but not amazing. The filling was tasty but a little liquidy and made the bottom of the tortilla soggy. The idea of baking the chimichangas is a good one, but I'd probably make up my own filling. You could probably do this with chili colorado or chili verde or whatever your favorite chimichanga or burrito filling is.

Enjoy the week, and check back for another post in a few days.

Saturday, March 2, 2013

Ah, Love, Thy Name is Bread Machine.


I got a bread machine for my birthday (Thanks, Mom!).
This is the one I got. Photo from Amazon.com
 I've been wanting to make my own bread.  Like most processed or prepared foods, the ingredients on loaves of bread in the store contain a LOT of ingredients.  I've been thinking a lot about the ingredients in prepared or processed foods. When I read the back of a package, I wonder why there are so many ingredients listed when the recipe for making the same thing contains half (or fewer than) that number.

     Example, Wonder Bread (which despite being made by the defunct Hostess Foods is not gone forever as it has been sold to another company) has 29 ingredients listed on its package--29!  Now, not all store-bought breads contain this many ingredients, but even Milton's 100% Whole Wheat Bread, arguably a much healthier choice than Wonder, contains 14 ingredients. Also, all store-bought breads seem to contain soy in one form or another.  Now, I'm not anti-soy.  I like soy sauce and the occasional bean curd stir fry. I do have a problem with the fact that so much of soy is GMO. Also, it's the general problem I have with all these added ingredients in food.

     How many ingredients are there in a homemade loaf of bread?  I'm glad you asked.  It depends on the recipe you are making, but for a basic white loaf, the bread cookbook I have calls for 9.  Some of the bread recipes call for fewer, but 6 - 10 ingredients is usual among the recipes.  Also, all of these ingredients are recognizable.  Water, honey and/or sugar, butter or oil, flour, yeast, and salt are the basics. Some recipes call for dry milk powder for added protein and wheat gluten for protein and to make the bread softer. However, no artificial ingredients or colors are called for and no weird fillers either.

     I've made bread before, but it never turned out all that well.  It was edible, but not super tasty.  I never seem to be able to knead the dough properly.  The bread machine solves that.  The first thing I made with my bread machine was a loaf of the above mentioned white bread.  I ran the whole bread machine cycle from mixing to baking.  It turned out well. My problem was that I had no bread knife.  That didn't deter me for long, I just hacked off pieces and ate them.  I ended up freezing half the loaf until I got a chance to find a good bread knife.

     The next thing I made was pizza dough. This time I just ran the dough cycle on the bread machine, which mixes, kneads, and rises the dough, but doesn't bake it.  I made one batch with all white flour and one batch with half white and half whole wheat flour.  They both turned out great.  Perfectly chewy, crusty pizza dough.  I had a couple of friends over, and we made individual pizzas with lots of yummy toppings including pepperoni, sausage, zucchini, onions, and lots of cheese.  Makes me hungry just thinking of them.

     Then I made sticky buns.  Oh my goodness, these were stunningly delicious.  I found the recipe for Morning Sticky Buns in Beth Hensperger's The Bread Lover's Bread Machine Cookbook (Harvard Common Press, 2000).  The buns came out perfect.  I couldn't believe it.  The best thing about these was that the insides didn't end up too gooey.  The caramel topping was wonderfully gooey, but the bun itself was soft, but fully cooked, not underdone and doughy like they can be.  I highly recommend them for a special treat.

Morning Sticky Buns

Recipe by Beth Hensperger from The Bread Lover's Bread Machine Cookbook

Ingredients

For the dough:
1 1/4 cups fat-free milk
1 teaspoon vanilla extract
3 tablespoons unsalted butter, cut into pieces

3 cups unbleached all-purpose flour
3 tablespoons sugar
1 1/4 teaspoons salt

2 teaspoons SAF yeast or 2 1/2 teaspoons bread machine yeast

For the cinnamon filling:
3/4 cup light or dark brown sugar
1 tablespoon ground cinnamon
6 tablespoons unsalted butter, softened

For the caramel:
1/3 cup unsalted butter
1 cup light or dark brown sugar
1/4 cup light corn syrup
1 cup chopped pecans

1. To make the dough, place all the dough ingredients in the pan according to the order in the manufacturer's instructions.  Program for the Dough cycle; press Start.  The dough ball will be soft, yet at the same time smooth and springy.  Combine the sugar and cinnamon for the filling in a small bowl.  Set aside.

2. To make the caramel, 10 minutes before the end of the Dough cycle, grease the sides and bottoms of a 13-by-9 inch glass or metal baking pan. (I prefer to use a metal or disposable aluminum pan if I will be rising the buns overnight in the refrigerator--a glass pan cold from the refrigerator could break when placed in a hot oven.)  Combine the butter, brown sugar, and corn syrup in a small skillet or heavy saucepan over low heat, stirring constantly.  When the butter is melted and the sugar is dissolved, remove from the heat.  Immediately pour into the baking pan.  Spread evenly over the bottom with a rubber spatula.  Sprinkle with the nuts.  Set aside.

3. When the machine beeps at the end of the cycle, press Stop and unplug the machine.  Turn the dough out onto a lightly floured work surface.  Roll it into a 12-by-15 inch rectangle.  Add the filling:  Leaving a 1-inch border around all the edges-spread the surface evenly with the 6 tablespoons soft butter, then sprinkle evenly with the sugar and cinnamon, which will be quite a light filling.  Roll up jelly-roll fashion starting from a long edge, and pinch the seam to seal.  With a serrated knife using a gentle sawing motion, cut the roll into 12 equal portions, each slice about 1 1/2 inches thick.  Place the slices close together on top of the caramel, spiral cut side down.  Cover loosely with plastic wrap and let the rolls rise at room temperature for 45 minutes, or until puffy and even with the rim of the pan.  (The rolls can be refrigerated before this last rise, covered tightly with a double layer of plastic wrap, leaving the rolls to rise to rise slowly and be baked in the morning.  Remove the pan from the refrigerator and let rest for 20 minutes before baking.)

4. Meanwhile, preheat the oven to 350 degrees F.

5. Bake the buns until the tops are brown, 30 to 35 minutes.  Remove from the oven and let stand no more than 5 minutes on a wire rack.  Place the cooling rack on top of the pan and, securely holding the hot pan with oven mitts, invert the pan on top of the rack, taking care not to touch the not caramel.  Let cool for at least 20 minutes, then transfer to a serving plate.  Pull the buns apart and serve warm.

Sorry for the lack of photos.  I never seem to plan ahead these days for taking pictures for the blog.  I'll try to do better in the future.

Some references:
Wonder breads 29 ingredients: http://theysmell.com/wonder-bread-ingredients/
Milton's 14 ingredients: http://www.shopwell.com/miltons-100-whole-wheat-bread-whole-grains/bread/p/0654192088
The Bread Lover's Bread Machine Cookbook on Amazon.com

Sunday, January 13, 2013

Playing Catch Up

Happy New Year! It was a very busy December for me both cooking-wise and work-wise. Work went absolutely mad in December. Between holiday parties (5), a huge job assessment questionnaire to complete, and a last minute website makeover, I was dead tired and mentally exhausted.

I did get to do a bunch of baking and cooking for the above mentioned holiday parties. I made toasted oatmeal cookies and shortbread cookies for our libraries' open houses, stuffed pasta shells (x2) for the end of the semester parties for our student library aides, and Holiday Beans for the staff Christmas party.

I really like the Toasted Oatmeal Cookies. I found the recipe at the Betty Crocker website.  The first time I made this recipe, I adapted it a bit to use what I had on hand.  I had used my oats to make granola, and I realized that the granola was very similar to what goes into the cookies: oats and nuts, toasted in the oven before being incorporated into the dough.  Instead of the 2 1/2 cups of oats and the 1 cup of nuts, I used 3 1/2 cups of granola. The recipe only calls for brown sugar, but I've found that this can make the cookies come out too thin and a little too sweet.  It works better if you don't pack the brown sugar, and I think I might try it with 1 cup brown and 1/2 cup white next time.

I've mentioned the shortbread cookies in a prior post.  The recipe I use comes from Brown Bag Designs Shortbread pans.  I've used their Classic Shortbread recipe for years, and it never fails.

Now for the stuffed pasta shells...I realize that I haven't blogged about these before, and I must amend that oversight right now.  These are always a huge hit, and I've made them for potlucks at work (current and past jobs) and for family dinners and special occasions.  I got the idea from a pasta cookbook I have.  I changed the recipe, of course.  I just can't seem to help myself.  They're not difficult, but there are several steps and the prep takes a while.  The filling has cream cheese, cheddar cheese, mozzarella  milk, eggs, and a little basil.  I use my regular spaghetti sauce I make (usually without meat though) for covering the shells before baking.  The shells are vegetarian as long as you don't use any meat or broth in your sauce.

Stuffed Pasta Shells

For the filling:
1 eight (8) ounce package cream cheese, softened
3 - 4 large eggs, room temperature
1/2 cup milk
3 - 3 1/2 cups shredded cheese (I use a mix of cheddar and mozzarella.)
1 1/2 tsp. dried basil (optional--sometimes I forget to put it in and the shells are still yummy.)
a couple of dashes of black pepper


1 box jumbo pasta shells (I like Barilla, but I've had good results with other brands as well.)
3 cups spaghetti sauce (approximately--should be enough to fill in all of the spaces around the shells once they are in the pan with some sauce left to go over the top of them.  The sauce doesn't need to cover them completely, but there should be plenty)

Make the Filling:
Place the cream cheese in a large mixing bowl.  Beat it on low speed with a hand mixer until the cream cheese is smooth.  Add the eggs and continue beating until well incorporated.  There may still be small chunks of cream cheese, but that's okay as long as it's mostly blended well with the eggs. Stir in the milk, and then fold in cheese.  The filling can be mixed and chilled an hour or two head of time.  Chilling the filling helps thicken it and makes it easier to fill the shells.

Pre-cook the Pasta:
Cook the pasta shells according to the package directions, but for a minute less than al dente.  For example, if the pasta box says that the shells will cook to al dente in 10 minutes, I cook them for 9 minutes.  Drain and rinse the shells in cold water until they are cool enough to handle.

Assemble the Shells:
Preheat oven to 350 degrees.  Rub a little olive oil over the bottom and sides of a 13 x 9 inch baking pan.  Spread about 3/4 cup of sauce in the bottom of the pan.

Using a teaspoon (not the measure, but the place-setting spoon), spoon filling into shells.  Fill each shell with a heaping scoop.  The shells should be filled but not overstuffed.  The edges of the shells should still be able to touch.  Place each shell in the pan as you fill it.  You should be able to fit all of the shells into the pan.

Pour the remaining sauce over the shells then gently shake the pan to get the sauce into all of the spaces between the shells.  Loosely cover with a piece of foil and bake in the oven for 45 minutes.  Remove the pan from the oven, take off the foil, and sprinkle the top of the shells with some freshly-grated Parmesan cheese. Put the pan back in the oven for 15 minutes, until the Parmesan is melted and the sauce is bubbling.

Remove from the oven and let sit for 20 minutes before serving.

After all the craziness of the last two weeks of work, I flew back to California to spend Christmas with family.  I got a chance to relax over the holidays, and I had a great time visiting my wonderful family: mom, sister, brother-in-law' and nephew, and some of my dearest friends.  I didn't get to see my brother and sister-in-law, but we did have a nice talk on Christmas.  However, I got to visit them back in September, which was great.  I was so happy to see them.  They moved away when I moved here to Arizona, and I hadn't seen them since I moved.  Hopefully we can all be together next year around Christmas.

I hope you all had a very Merry Christmas, Happy Hanukah, and wish you a very Happy New Year.

Sunday, March 27, 2011

Dinner With A Side Of Nostalgia

Pot Roast

Does anybody out there make pot roast regularly? I haven't made one in years, but I found this great grass-fed chuck roast recently at Noah's Ark in Placerville. There's just something homey and comforting about pot roast. It reminds me of my grandma (my dad's mom) who passed away a little over a year ago. There were three dishes that I think of as her specialties: "Spanish" meatballs, mustard/brown sugar pork chops, and pot roast. She made excellent corned beef and cabbage too, and her cole slaw (she always called it cabbage & carrot salad) couldn't be beat. She also made the best butter cookies. I've got the recipe somewhere. They were just light and crispy with a nice buttery flavor without being too rich. I can remember helping her mix up batches when I visited her.

       When my siblings and I were kids, we would each go spend a week with grandma individually during the summer. During that week, the kid who was visiting was "The Big Cheese." My grandma and I would bake cookies, go shopping, and play tourist in Sacramento. She taught me how to crochet (I made endless hats, scarves, and socks for all the stuffed animals), to play cribbage, and to swim. Her neighbor had Corgis that were so cute. It's funny how much you remember when you start thinking about your childhood.

       Well, this is supposed to be a food blog, so I'm writing today about the pot roast (pretty darn good) and the madeira cake (not quite a fail) I made yesterday. Once again, I didn't have a go-to recipe, so I cobbled together a recipe I found online with my mom's advice on how to proceed in the endeavor of pot roast making, and the result was quite yummy.

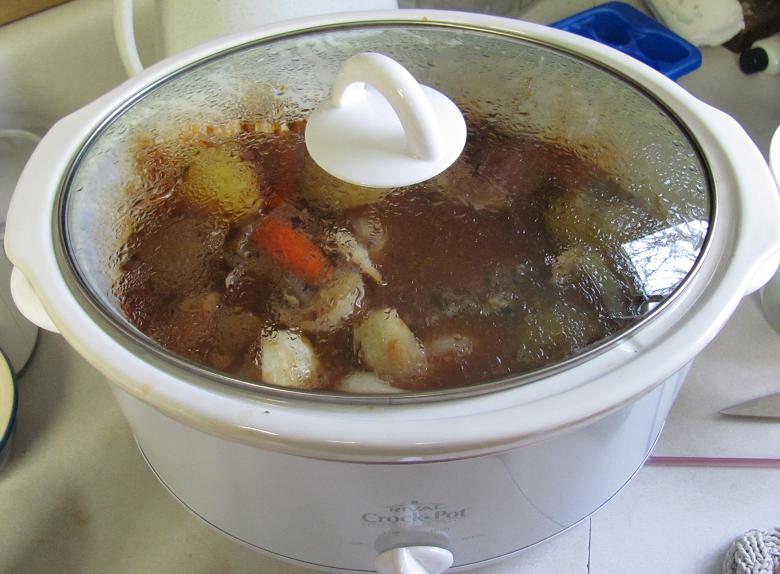
       First I patted the chuck roast dry with a paper towel then sprinkled it with a little flour, salt, and pepper before browning it on all sides in a skillet with a little oil. Once all the sides were nice and brown, I transferred the roast to my Crockpot. I love this Crockpot; it was a gift from my sister one year for Christmas or my birthday, and it is just perfect. It's a perfect size, not too small and not too big, and it's not all gadgety with digital readouts and programmable controls. It has 4 settings: high, low, warm, and off. That's the beauty of a Crockpot, you don't have to do much. Once you start it, it's good on its own for several hours (or more) before you have to do anything. When the dish is done, you really only have to turn it down to warm or off and serve dinner.

       The chuck roast went into the Crockpot along with a sliced yellow onion, a few potatoes, and some carrots. I threw in some garlic powder, parsley, and thyme for good measure. Then I poured in one 12 oz can of V-8 and about a cup and a half of water. My mom suggested the V-8 because that's how she used to make it. She said she used it because it added the flavor of the vegetables, but not chunks of veggies we kids didn't like when we were little. I turned the Crockpot to high and left it for about an hour. Then I turned it to low and left it for another 5 hours or so.

       When the roast was done, I turned the Crockpot to warm and then ladled out about 2 cups of the broth, straining it into a smaller bowl. I chilled this for a bit so I could skim as much fat off as I could before using it to make the gravy. When I made the gravy, I browned some flour in a dry pan. You don't really need to used oil or butter to brown the flour when making gravy (cream sauce is another story). Just keep the flour moving (I use a wire whisk) and the temperature of the burner at medium to medium-low, and it browns just fine. Once the flour is ready, pour in the hot liquid and stir like crazy. This works for me, minimizing the problem of lumps. I added a little salt and pepper and let it bubble for a bit before serving it up with the roast and vegetables. All-in-all a success, and and enough leftovers so I can take some for lunch at work tomorrow.

Madeira Cake
       While the roast was cooking, I was thumbing through my new baking book I got just after Christmas. It is full of interesting recipes I'm not very familiar with. One of these is madeira cake. The description goes like this, "This rich butter cake was popular in Victorian England. It was often served with a glass of Madeira, hence the name. It is a moist tender cake due to the high butter content." Sadly, the same could not have been said about my cake. The photo and description in the cookbook made it sound similar to pound cake only with some orange zest mixed in. Something didn't seem quite right when I mixed up the batter; it was more like soft cookie dough than cake batter. It seems to me now that the amount of flour called for might have been too much and/or the liquid ingredients should have been increased. Still, I persevered. I spooned the batter into the loaf pan and patted it smooth. I baked it exactly according to directions: 315 degrees (weird) for 50 minutes.

       The cake was not a success. It was dense and on the dry side. The crispy texture of the outer crust was good, as was the flavor of the cake (I mixed in about a teaspoon each of orange and lemon zest.) The texture really needed help. My mom sprinkled some Amaretto Di Saronno on her piece after the first bite, which helped with the dryness. The one thing that did go perfectly was turning the cake out of the pan. The recipe called for greasing the pan then lining it with parchment paper. Once the cake was baked and allowed to cool for about 10 minutes, it just slid right out of the pan, and the crust was smooth with no stuck spots.

       After about an hour's mild disappointment, I had a brilliant thought: Trifle! The cake would be perfect to use in a trifle. Slices of cake or ladyfingers are layered on the bottom and part way up the sides of a trifle dish (if you have one. otherwise, a glass bowl). The cake is then brushed with liqueur or sherry then layered with fruit, custard, sometimes jelly (either Jello or jam), and topped with whipped cream. There are any number of variations. I will be making the trifle tomorrow night or possibly Tuesday, and we'll see how the cake tastes in that. I think it will hold up well; the wet ingredients (liqueur, custard) will soften and moisten it without causing it to dissolve into a soggy mess. I'll let you know how it turns out.

Monday, February 7, 2011

Week in Review--Nothing Too Exciting Happened

I haven't posted in about a week, so I thought I'd better write something so people don't think I've fallen off the map. Not much new in the dinner department. I pretty much stuck to the old reliables of roasted chicken, crispy ginger bok choy, roasted veggies, meatloaf, and pasta.


I did the chicken a little differently this time (I seem to always say that). I had chicken drumsticks that I sprinkled with salt & pepper, oregano, and garlic powder. I then sliced up a lemon and laid the slices on top of the chicken pieces before roasting them. The mixture of lemon and oregano was a suggestion from a very nice woman with the Greek Society when we were talking to her about party and food themes last year. I did this once with a whole chicken--sprinkled it with s & p, oregano, and fresh-squeezed lemon juice and put more oregano and 2 cut up lemons in the cavity. So yummy! And a little out of the ordinary for me as that wasn't previously in my repertoire.

I did a little baking this past week or so. I experimented with jam thumbprint cookies. I used a recipe from The Joy of Cooking which starts with a butter cookie recipe. You roll the dough into balls, roll them in chopped nuts, and make a little divot in the top for the jam. I didn't read carefully enough because I apparently was supposed to bake them for a few minutes, then make the divot and add the jam before finishing the baking. I just did it all at the beginning and then popped them in the oven. They really spread out, and I was afraid the jam would end up everywhere. It wasn't too bad, and luckily, I had the foresight to use parchment paper so any jam that did ooze out onto the baking sheet stuck to the paper and not the sheet itself, turning hard as a rock. They tasted quite good but didn't look very pretty.

One other day I made butterscotch brownies also from The Joy of Cooking. This is one of my "go-to" recipes. Super easy, quick to make, and with only a few ingredients. They are basically brown sugar mixed into melted butter to which is added flour, baking soda, salt, and vanilla. They are thin, but have a wonderfully chewy texture and a rich caramel/butterscotch flavor. Both of these cookie recipes are from a 1960s edition of The Joy of Cooking, but they might still be in the newer versions.

This week also saw some (very early) spring cleaning, much knitting, and dealing with kittens. Eddie decided it would be a good idea to jump into my plate of grilled cheese sandwich and then jump down tracking dirty pawprints across my jeans and the rug. Zeke was shocked.


But Eddie just gave me a dirty look and sauntered off. The kittens did manage to endear themselves though by curling up cutely and taking a nap with the stuffed hippo I got for Christmas (hippopotamus for Christmas).


We also went from chilly, foggy weather to balmy almost spring-like weather.


I experimented today with placing photos within the blog. I'm still not loving the placement exactly, but I didn't feel like putting in a lot of tables so everything lined up all nice and neat. Maybe next time.

Friday, January 7, 2011

New Cookbook


I got a Borders gift card from my wonderful brother and sister-in-law (among other fabulous presents), so I went down to Borders for their big after Christmas sale, and found some great bargains. One of those is The Essential Baking Cookbook (ISBN 978-0681025936) published by Bay Books.

This book has everything from bread to cakes and pies to cookies and muffins. I didn't realize at first, but it's an Australian publication which means it has lots of cool things you don't normally find in U.S. cookbooks (though it also lacks some things you'd expect to find in a U.S. cookbook). Ingredient measurements are offered in cups, grams, and ounces unless they are smaller than a 1/4 cup--then they are in teaspoons and tablespoons.

I made rolls from the bread section on Sunday, and they turned out well. I don't have a lot of experience making yeast bread, so I was a little nervous. I made sure I set the timer so I'd knead the dough for long enough, and I bugged my mom with lots of questions about whether it seemed to be rising properly. The rolls turned out tasty and the texture was right. They tasted good, but there seemed to be something lacking, but I had a hard time putting my finger on it. My mom and I finally decided it might be that a little more salt or sugar was needed. The recipe called for 1 tsp. of salt and 4 tsp. of sugar (divided) for 4 cups of flour. I'll probably up the salt by 1/2 tsp. and the sugar by 1 tsp. next time and see if that makes a difference.

I had a problem with how the rolls browned. The book gave examples of different glazes to use either before or after baking. I did an egg wash that was supposed to give the rolls a "deep colour in the crust." I didn't find it to work well. The bottoms browned faster than the tops, and the tops stayed kind of pale. I will consult the "What Went Wrong" section of the cookbook to see what I can do next time to get they outcome I want.

I have lots of great recipes to experiment with in the coming year. I also will be attempting to plan ahead meals more. It's much easier to get dinner going when you know you have the ingredients on hand to make one of a selection of recipes. What I've done occasionally in the past is to pick out 5 meals to make for dinners for a week (the other 2 days are for leftovers), and then shop for those meals specifically. Then I leave the list of meals on the fridge and when I ask myself "What am I making for dinner tonight?" I can go consult the list and pick out what looks good (or is easiest to make, depending on how I'm feeling about cooking that day). This is probably not revolutionary meal planning to anyone except me, but I like how well it works, especially in avoiding the curse of indecision which leads to ordering pizza or going out to eat.

I've been doing pretty well incorporating more vegetables into my meal plans, listing not just the main dish but also possible veggies to serve as well. Having those veggies listed right on my weekly meal list is a good reminder so I don't end up finishing the main dish without having made any vegetable accompaniment. That's not really a problem if the meal already incorporates veggies in the recipe--like the roasted vegetable and chicken bake, but when I'm making something like oven baked bbq ribs, I hate finding myself with a ready-to-serve main dish but nothing to serve with it.

I'm going to continue to plan meals with plenty of vegetables; I always feel particularly virtuous after eating a dinner with lots of veggies. The baked chicken with roasted vegetables is now on the regular dinner rotation. There's a lot of prep, but it's not hard to make. And really, if I chose just 2 or 3 types of veggies instead of 5 or 6, it would probably take less time to prep.

What I really want to do is improve at making stir fry. Mine seems to always turn out with either overdone or underdone veggies. Perhaps I need a wok instead of using the large skillet. Hmm, maybe I can convince my mom she needs a wok. I will be researching stir fry techniques, but if anyone has a good method they use, please post a comment. Thanks.

Saturday, November 20, 2010

Pumpkin Praline Torte


Since it's been mentioned recently on facebook, I thought I'd post about the Praline Pumpkin Torte that so wowed everyone I know who has tasted it.

About 5 years ago, my mom emailed me about a recipe from Sunset magazine she thought looked good. It would be something different for the holidays while still being seasonal. I looked the recipe over, and it looked really good. It was a big hit from the first.

Fast forward 2 years to Thanksgiving 2007; I was in Boston at grad school for my MLIS. Since I was going home to California for Christmas, I stayed in Boston for Thanksgiving. Some of my friends and co-dorm residents were also staying, so we decided to make our own Thanksgiving dinner. It turned out great! Everyone made something, and it was all so yummy. I was in charge of dessert, so I decided to make the Praline Pumpkin Torte.

It was a huge hit! There's just something about the combination of layers of rich, spicy pumpkin cake studded with praline pecans and sandwiched together with whipped cream.

The recipe was featured in a Sunset Magazine website feature called 17 Thanksgiving Desserts.

Praline Pumpkin Torte
from Sunset

Notes: You can bake the cakes (through step 3) up to 1 day ahead; cover and store at room temperature. [I recommend making them at the night before, letting them cool, and then wrapping them up. I think it makes the cake dense, moist, and melds all the flavors together.] Up to 6 hours ahead, assemble layers; cover with a large inverted bowl or pan and chill.

Prep and Cook Time: about 1 hour, plus 1 1/2 hours to cool cakes.


3/4 cup firmly packed brown sugar
1/3 cup butter
3 tablespoons plus 1 3/4 cups whipping cream
1 cup chopped pecans
4 large eggs
1 2/3 cups granulated sugar
1 cup vegetable oil
2 cups canned cooked pumpkin
1 teaspoon vanilla
2 cups all-purpose flour
2 teaspoons baking powder
2 teaspoons pumpkin pie spice (or 3/4 teaspoon each ground cinnamon, ginger, and nutmeg)
1 teaspoon baking soda
1 teaspoon salt
1/4 cup powdered sugar

1. Preheat oven to 350°. Butter two 9-inch round cake pans. Line bottoms of pans with cooking parchment. In a heavy 1- to 2-quart pan over low heat, stir brown sugar, butter, and 3 tablespoons whipping cream until melted and blended, about 5 minutes. Pour half the brown sugar mixture into each of the cake pans. Sprinkle 3/4 cup chopped pecans evenly into pans.

2. In a bowl, with a spoon, beat eggs, granulated sugar, and oil until well blended. Stir in pumpkin and 1/2 teaspoon vanilla. In a bowl, whisk together flour, baking powder, pumpkin pie spice, baking soda, and salt to blend. Whisk dry ingredients into pumpkin mixture until well blended. Pour half the batter into each of the pans; smooth top.

3. Bake until a toothpick inserted in center of cakes comes out clean, 30 to 35 minutes. Let cool in pans on racks about 5 minutes, then invert onto racks and remove pans and paper. Let cool completely, about 1 1/2 hours.

4. Up to 6 hours before serving, in a bowl, with an electric mixer on high speed, beat remaining 1 3/4 cups whipping cream until soft peaks form. On low speed, beat in powdered sugar and remaining 1/2 teaspoon vanilla just until blended. Set one cake layer, pecan praline side up, on a serving platter. Spread two-thirds of the whipped cream mixture over the top. Set second layer, praline side up, on top. Cover with remaining whipped cream mixture. Sprinkle with remaining 1/4 cup chopped pecans.

Yield: Makes about 12 servings

If any of my friends who have made this cake have any variations they've tried, let me know.

--recipe and photo copyright Sunset Magazine, photo by Monica Buck--

Thursday, October 21, 2010

Cheese Sauce & Scones (don't worry, not together)

Cheese Sauce
I guess it was Sunday afternoon when my mom sent me a text asking me what I was making for dinner. At that point, I hadn't even thought much about dinner. I'd been feeling a little funky during the day (guess I was gearing up for that migraine on Monday), so I had nothing planned. Luckily, we had some leftover Italian sausage, so that went on the menu. Then I saw the squash we're still working our way through. Steamed squash always works. That seemed a little boring, so I decided to make some pasta with cheese sauce.

Cheese sauce is actually pretty quick and easy to make, and when you pour it over noodles, you get a quick mac and cheese that tastes way better than boxed stuff. (I like the boxed stuff too sometimes, but this is just better.)

The cheese sauce I make is basically a white sauce with added cheese and a little dijon mustard, nutmeg, cayenne, salt, and pepper.

2 Tbsp butter
2 Tbsp flour
1 cup non-fat milk (you can use any milk--I just use what I have which is generally non-fat)
3/4 - 1 cup shredded cheddar (or jack or whatever you have on hand that is similar to either of these--I think my favorite is a combo of mild cheddar and smoked Gruyere.)
2 tsp Dijon mustard
ground nutmeg
cayenne pepper
salt
black pepper

Heat the milk in a small saucepan or in the microwave until it is hot but not boiling. Melt the butter in a saucepan on medium-low heat. Add the flour and cook, stirring constantly for about 3 to 4 minutes. Keep the heat low so the flour mixture doesn't brown. Whisking constantly, pour the milk into the flour mixture and mix vigorously until the sauce is smooth with no lumps. I have found that having the milk heated makes it easier to mix it into the flour mixture.

Keeping the temperature low, stir in 3/4 cup shredded cheese (more or less), Dijon mustard, a dash or 2 each of nutmeg and cayenne, and salt and pepper to taste. Stir well to fully mix in all the ingredients. Let simmer, covered, on low while you finish cooking the rest of your meal. If the sauce is too thick, add a little more milk or water until it is the desired consistency.

Cook up some pasta and mix in the sauce with whatever else you like (I like to add peas to mine.), and you've got mac and cheese.

Scones
I made scones today. I've made them from a mix and once before I've made them from scratch, but I couldn't remember what recipe I used. I did a search for scone recipes, and I think I found the one I used before. These scones turned out perfect. Scones aren't really like a biscuit--they're more NOT like a biscuit...meaning it's helpful to use biscuits in comparison to describe scones, but they aren't really that alike. Scones are denser than biscuits. They are also a bit sweeter, and the outside is slightly crispy but also flaky like shortbread In fact, that's probably the best way to describe these scones--kind of a cross between a biscuit and shortbread. Very yummy.

Cream Scone Recipe:
from Joy Of Baking.com
with some changes and commentary by me

2 cups (260 grams) all-purpose flour
1/4 cup (50 grams) granulated white sugar
2 teaspoons (10 grams) baking powder
1/4 teaspoon salt
1/3 cup (75 grams) cold butter, cut into pieces
1 large egg, lightly beaten
1 teaspoon pure vanilla extract
1/2 cup (120 ml) heavy cream (contains 35-40% butterfat)

Glaze:
Cream

Preheat oven to 375 degrees F (190 degrees C) and place the rack in the middle of the oven. Line a cookie sheet with parchment paper. (I was out of parchment paper, so I just put the scones directly on the cookie sheet. I recommend parchment paper though as my scones ended up a little dark on the bottom.)

In a large bowl, whisk together the flour, sugar, baking powder and salt. Cut the butter into small pieces and blend into the flour mixture with a pastry blender or two knives (I used my hands, working quickly so as not to let the butter get too warm). The mixture should look like coarse crumbs. In a small measuring cup combine the whipping cream, beaten egg and vanilla. Add this mixture to the flour mixture. Stir just until combined. Do not over mix.

Knead dough gently on a lightly floured surface. Roll or pat the dough into a circle that is about 7 inches (18 cm) round. Then, using a 2 1/2 inch (6.5 cm) round cookie cutter, cut the dough into rounds. (Alternately, you can just cut the dough disc into wedges.) Place the rounds on the prepared cookie sheet, spacing a few inches apart. Brush the tops of the scones with a little cream. This helps to brown the tops of the scones during baking. (I didn't find this to be true, but the cream does make them nice and glossy-looking.)

Bake for about 12 - 18 minutes or until nicely browned and a toothpick inserted into the center of a scone comes out clean. Remove from oven and transfer to a wire rack to cool. Serve with Devon cream or softly whipped cream and your favorite jam.

Makes about 8 round scones.

These are excellent with clotted cream and jam, but they are also great with just jam or lemon curd. Frankly, I even like them plain.

I really need to get my camera out and take some photos of the stuff I make. I think it could get boring just hearing about things without ever seeing pictures. I also need to try to find a way to format the recipes so they are easier to read. I'll work on that.